- Alex D.
- Shower drains
- 2056 views

As you know in construction and especially finishing works, the devil is in the details. Very often, these details, which should be paid special attention to during the work, determine the unique appearance of the room, as well as the appropriate strength of the materials used. This is exactly the case for tile joints. Choosing the right color, type and then proper use is the basis for trouble-free bathroom use for years.
The first decision to be made before laying the tiles is the size of the joints. It has become fashionable to go for groutless tiles installation. In fact, groutless actually means a very narrow grout with a width of only 1-2 mm. We must remember that for this width we need more expensive rectified tiles with equal dimensions and polished edges. Otherwise, it won't be possible to lay the tiles straight enough and the appearance may turn out to be horrible. The standard size grout is approximately 5 mm.
When it comes to choosing the right grout color, you must demonstrate a sense of aesthetics and imagination. The only rule that is worth sticking to is not using very bright coloured grout on the floor. Such grout in the most frequently used places will darken quickly and will be impossible to clean.
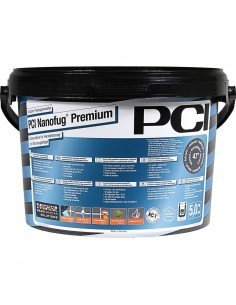
It is also worth choosing products of higher quality with low water absorption capacity and with fungicides. These are the most desirable features in bathrooms and especially in wet-room type showers. A little higher cost of high quality grout can save us some problems in the future. The PCI NANOFUG® PREMIUM offered in our shop is the one you should consider.
Before grouting, you must properly clean the grooves between the tiles. Scrape the tile adhesive residue well and thoroughly vacuum everything. Clean and deep grooves will guarantee good adhesion of the grouting mortar. Another very important step is the impregnation of some types of tiles. In the case of porous tiles and stone, this is an obligatory point before grouting. If this is neglected, the grouting mortar will be virtually impossible to remove from the tiles. Avoid impregnating the grooves.
When all the above decisions and actions have been made, we can proceed to grouting. Below are a number of rules that will help you avoid problems when grouting.
- First of all, prepare all the tools needed for making and finishing joints beforehand
- Never mix the whole mortar package right away. A grouting mortar is a fast drying product.
- Work in parts. For example, one wall at a time (if it's not to long).
- Stick to the consistency and mix ratio given by the manufacturer on the packaging.
- Use the right tools.
- Be precise. All grooves must be completely filled with mortar.
- Immediately after filling start forming and washing of the grout.
- If you do not feel up to it, it's better let a specialist do the job
There are two final steps to do after grouting is done. In the corners of walls and floors, and around sanitary facilities, a sanitary silicone is used instead of a grout. Silicone job is much easier than grouting. For details, read one of the previous articles HERE (It's best to use grout and silicone from the same manufacturer so that we will not have problems with matching the colors). It is also worth considering additional impregnation of the grout. There are special products that will reduce the water and dirt absorption of the joints.


