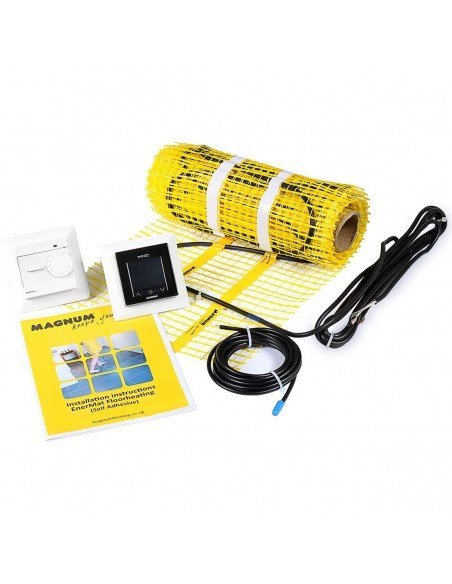
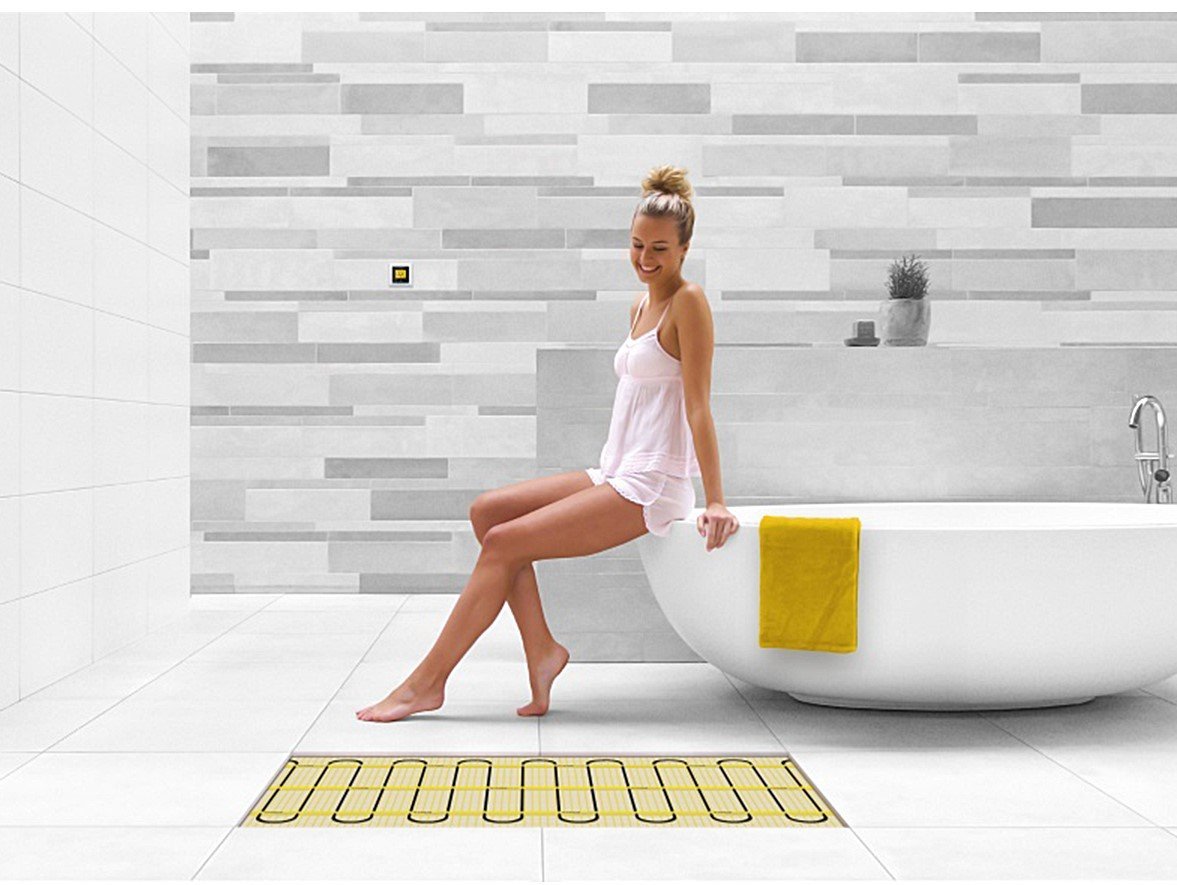
The MAGNUM Electric Heating Mat 1 m² 50 cm x 2 m is a unique type of floor heating mat. The system has been designed to be used on an existing tiled floor or an existing finished floor, so that floor heating can still be installed there. The mat is approximately 4 mm thick and can be included in a layer of adhesive without any demolishing or grinding. The mat fits virtually underneath the surface. This decreases the heating time of the floor, that also makes this system suitable for rooms that are not permanently occupied including bathrooms, studies, playrooms, etc.
The advanced thermostat takes account of the required heating period, so that your floor is always at the right temperature when you want it.
MAGNUM Mat is available in 22 different surface area sizes from 0.75 to 25 m². Because the heating cable connects through at the ends on the mat, the power supply cable is only on one side and invisibly secured using a unique connection. This means that a return to the thermostat is not required.
Based on current settings, if you Add to cart current set and then order, you will receive the following items:

Underfloor heating mat
Main heating element. Installed below the floor covering to convert electring current into warmth. Very shallow and water resistant make it suitable for wet room use.
3.5 mm thick
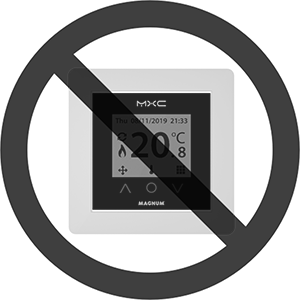
Control device
Control device. One can manage up to 23 m² / 16 amps. At least one should be included to every order.
Thermostat: Not included

Floor sensor
Magnum Probe Sensor measures current temperature of the floor, allows the thermostat to adjust the heating power.
Floor probe
Instructions & guide
Fitting instructions for Magnum heating kit with control check useful to measure voltage during installation.
for fitting and using
Underfloor heating mat set consists of all necessary parts for installation. One Thermostat is needed for every 23 m² of heating mat. It is included as optional, to allow ordering mat for custom areas, for example if you need 13 m² of mat total, you should buy 10 m² with one of the thermostats set as include and 3 m² with thermostat not included. In case you require less mat coverage than possible to buy from our product pictures, for example 14.5 m² you should always round low with your purchase and buy 14 m² as the mat is impossible to cut. It can be shaped but not shortened to size.
Underfloor heating mat technical properties:
- EMC-free 2-conductor cable fitted to fibre-optic net
- 2.5 meter 3-core supply cable
- Fully encased in an aluminium earthed sheath
- Unique blind connection between the heating and the connection cable
- Chrome/Nickel resistance wire
- PTFE (Teflon) insulation
- PVC protective sheath
- 10 -11 watt per meter resistance wire, 230 Volt
- Cable diameter approximately 4 mm
- Mat widths of 25 or 50 cm
- Complies with current NEN standards for installation in completely wet rooms
One thermostat and sensor can handle up to 16amps / 23 m² directly in so if you buy one and want to add more mat coverage, you don't need to buy additional ones. This product is also available in different sizes.
- Coverage
- 1 m²
- Thickness
- 4 mm
- Heating Power
- 150 Watt
- Roll width
- 500 mm
- Size
- 50 cm x 2 m
- Cable diameter
- 4 mm
- Resistance
- 10 - 11 Watt per meter
- Wire
- Chrome / Nickel resistance wire
- Encasement
- Aluminium earthed sheath
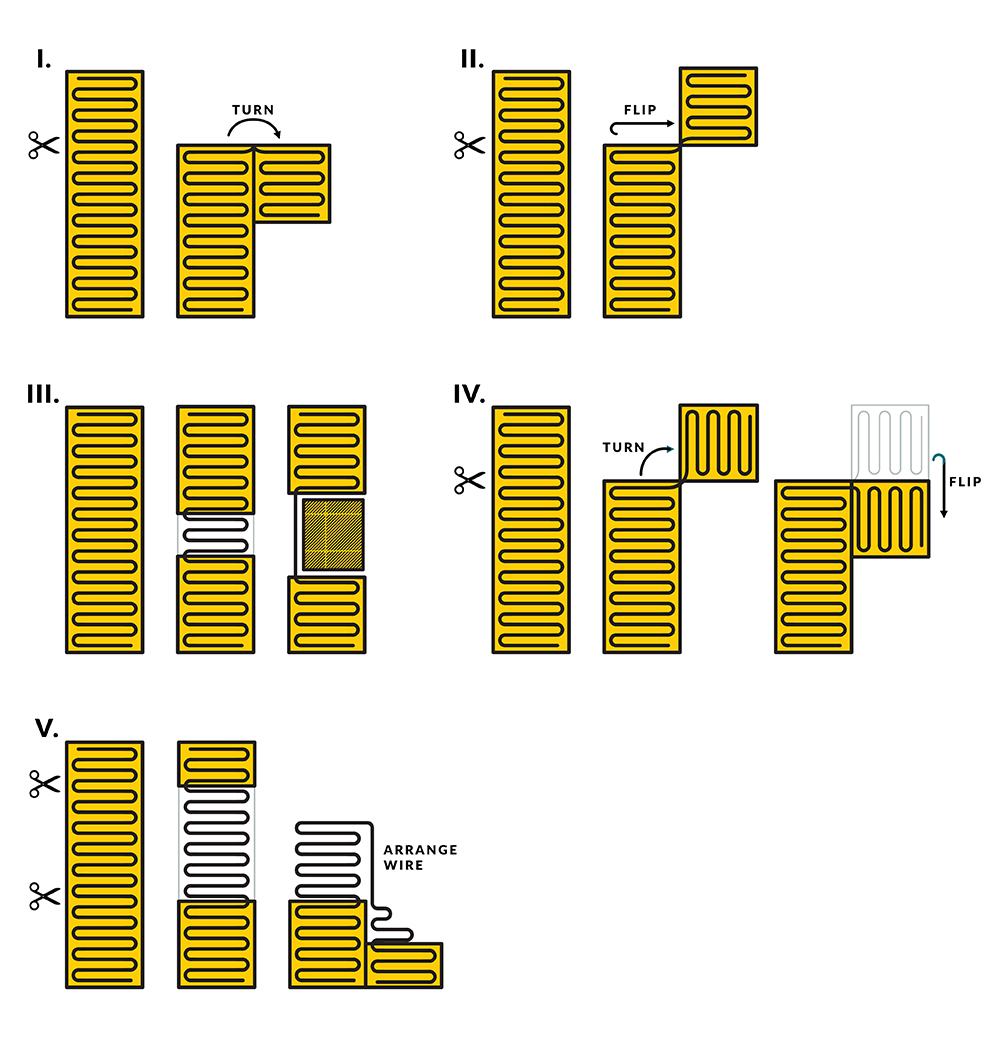
To modify the mat shape to fit the specific room area it might be necessary to cut and turn it. It should be done like shown below. Never cut the heating element. Make sure that the cables are not damaged during the process.
Underfloor heating should not be installed under the future shower appliances like bath or shower furniture.
This MAGNUM Heating product is manufactured from high quality, durable materials. To guarantee that your product functions optimally there are a few points of attention which are described in the Installation Instructions. We can only offer you the full guarantee if the system is correctly installed in accordance with these Installation Instructions. Carefully read the instructions prior to installation, do not forget the yellow centre page when doing so, and ensure that you have the correct tools and materials. The electrical installation must be carried out by a qualified electrician in accordance with current local regulations. Please visit magnumheating.com to find your local supplier if you have any questions, require more information or support. C&F Technics B.V. 2014 / All rights reserved
1. Check: Check the contents of the box before starting. A complete set consists of:
- A MAGNUM Mat with connecting wire
- An inspection card
- A MAGNUM X-treme Control digital thermostat incl. floorsensor*
- A flexible sensor tube
- Installation instructions
*To be ordered as separate item in some countries. Please visit http://magnumheating.com for details.
2. Measurements:
3. Points of attention:
The MAGNUM Mat electrical floor heater consists of a heating cable that is equally distributed and connected to a glass fibre net with an inter-loop distance of approximately 7cm. The MAGNUM Mat is fully earthed. Check before hand if the heating mat is the right size for the floor area to be heated and that there is sufficient electrical capacity (Amps.) available. The mat may not be positioned over expansion joints. Each mat is tested at the factory and has a unique inspection card. Every mat is tested at 4000 volt. Before installing the mat, the resistance reading should be taken and noted down on the inspection card in the center of this manual. (See point 7). The connector cable can be extended or shortened, there must always be at least 0.5 meter of connecting wire left. The heating cable, attached to the yellow glass fibre net, cannot be cut. The mats cannot be laid over each other and the heating cables may never cross each other! The cable junction (SPLICE) is the transition of the resistance cable (heating section of the mat) to the power cable (cold connection) is just within the heating mat and is marked. A distance from the wall of 10 to 20 cm should generally be adhered to. The MAGNUM Mat may never be installed under fixed objects like wall units, kitchen units, baths, or showers and must be able to give off its warmth unimpeded. The MAGNUM Mat may only be incorporated into the free floor areas. As bathrooms consist mostly of a small free floor area the mat can only be installed as supplementary heating. Please contact your local supplier for information about use as main heating. All installations must be wired through a suitably rated MCB or RCCD when applicable. All installations in wet areas must be wired through a dedicated RCCD in line with the thermostat. All connections must be made by an approved electrician in accordance with current local regulations. The MAGNUM Mat is 3 to 4 mm thick and must be incorporated in a flexible adhesive or casting mortar suitable for floor heating. Check the manufacturers data. The MAGNUM Mat has 1 connecting cable 3.5 meters in length (Twin Conductor) and has an end seal (loop) at the end of the mat. The end seal CANNOT be broken. The connector cable can be shortened, there must always be at least 0.5 meter of connecting wire left. The power supply must never be connected during installation. If multiple mats are installed in a space, they must be wired in parallel and a suitably rated junction box may be incorporated so that only one power cable runs to the thermostat. Maximum capacity of the thermostat is 16 Amperes. If combined area exceeds 23m², a Contactor will have to be fitted. The thermostat may only be installed by a qualified electrician. The sensor must be installed in the middle of a cable loop for optimal temperature registration. Ensure that the sensor is installed well clear (min. 50 cm) of (hidden) radiator and water pipes, drains and electrical wiring. The sensor must always remain IN the sensor tube. Fit cap to end of the sensor tube. If the sensor ever needs to be replaced it can then easily be removed. The MAGNUM Mat is primarily designed for installation on concrete floors. If laying on a wooden floor, all floors must be sheeted with a cement faced board which is compatible with heated floor systems. Or sheet the floor with 15mm WBP or Marine plywood, fix with screws at 200mm centres and then skim with 2-3mm of flexible tile adhesive and allow to dry, then proceed as installation for concrete base.
4. Necessary materials:
- A MAGNUM Mat System.
- Flexible tile adhesive or Self levelling compound and flexible grout suitable for floor heating.
- Flexible cement and cement gun for expansion joints along the walls.
- Approx. 2m flexible electrical conduit (16mm)
- (Plastic) adhesive comb with approx. 6mm teeth.
- Electrical back box (min 35mm deep, prefer-ably 50mm).
- Earthed power connection.
- A multimeter to test the mat after each installation activity.
- various tools.
5. Preparations:
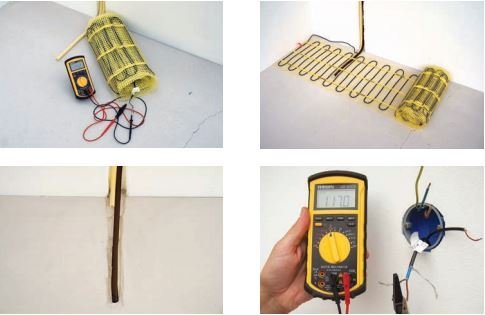
Determine where the thermostat must be placed, place a standard electrical back box with a minimum depth of 35mm, preferably at a height of 1.40 m for ease of operation. Grind/cut the necessary grooves and mount the junction box and electrical conduit. 2 conduits have to be installed; One for the sensor and the other for the power cable from mat. Do not run the power cable and sensor cable through the same conduit. Cut a groove in the floor for the floor sensor pipe (2 cm deep). TAKE CARE: Never place the sensor in the vicinity of a (hidden) radiator pipe! Never install it passing under a heating cable! Ensure that the surface where the mat is worked on is flat, clean, and free of dust and grease. In larger spaces, expansion joints along the wall may have to be used.
6. Resistance readings
Before installing the MAGNUM Mat, the resistance reading should be taken and noted down on the inspection card in the center of this manual. The reading should be taken during the installation and on final completion. These readings should be as per the technical information (Point 2). Take measurements both between the resistance wires and between the resistance wire and the earth cladding. Keep this inspection card in the meter cupboard in a visible place! This forms part of your guarantee.
7. Installation Instructions:
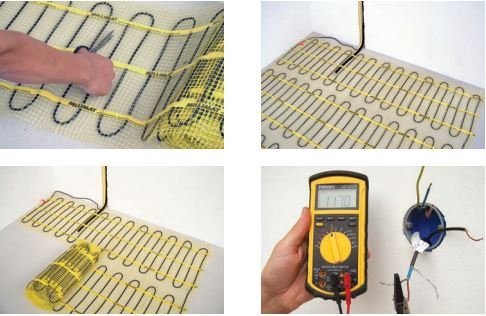
When installing in tile cement: (Point 10) Unroll the MAGNUM Mat with the heating cable down so that only the glass fibre netting is visible. For Self levelling compound: (Point 11): Unroll the MAGNUM Mat with the heating cable facing upwards using double sided adhesive tape. Determine how the matting must be laid. The glass fibre netting can be cut between the cable loops and folded over. Avoid damaging the cable! There are many possible variations when installing.
8. Measuring out the mat:
Allow for a distance from the wall of 20 to 30 cm when rolling out the matting in larger areas. This does not apply to glazed walls where extra heating is required. If the MAGNUM Mat is to long, the mat can be cut into a long length and laid round the periphery of the mat. The loose cables must be looped at least 5 cm from each other. They may not touch or cross each other. Retest the mat when it has been laid.
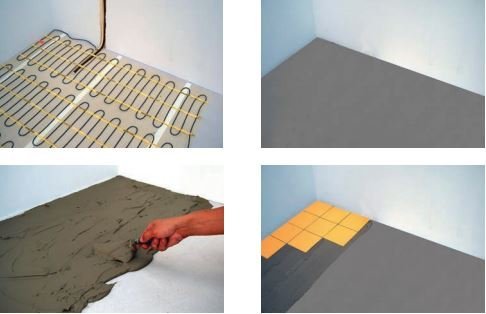
9. Tile cement method:
- Pull the end of the connecting cable through the electrical piping to the thermostat.
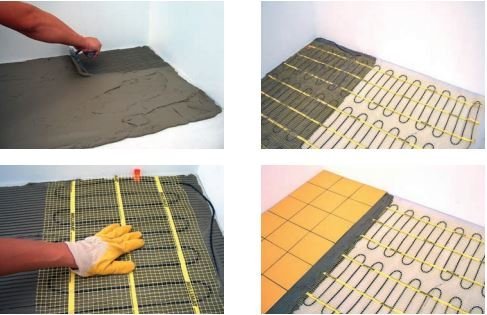
- Apply a first layer of Flexible tile adhesive 0,4 cm to 0,6 cm thick and approx. 55 cm wide.
- Roll the mat out over the tile cement with the cable facing downwards.
- Softly push the mat down with a wooden spatula or gloves and spread the tile cement that oozes through the mat.
- Smooth it over and allow it to dry.
- Take the resistance readings of the mat again.
- Then apply a second solid layer of flexible tile adhesive taking care to avoid air bubbles and use a plastic tile cement comb to avoid damaging the mat. (DO NOT SPOT TILE!).
- Press down the tile with a light sliding motion.
10. Self-Levelling method:
Position the mat as described in Point 6. Attach the mat to the floor with adhesive or double sided adhesive tape. Test the MAGNUM Mat again with a multimeter and write down the readings on the inspection card. Take measurements both between the resistance wires and between the resistance wire and the earth cladding. First read the instructions of the self-levelling mortar, check that the product is suitable for floor heating and follow the instructions of the manufacturer to the letter. The self-levelling effect must usually be assisted somewhat using a squeegee. Observe the drying time before applying the floor covering. Take the resistance readings of the mat again. Then apply a solid layer of flexible tile adhesive taking care to avoid air bubbles and use a plastic tile cement comb to avoid damaging the MAGNUM Mat. (DO NOT SPOT TILE!). Press down the tile with a light sliding motion. TAKE CARE: Do not apply more than 1 self levelling layer. Please follow manufacturers instructions.
11. Other possibilities:
You can also use the section that you have left over in the wall or the step to the bath. You can include it in the plaster layer or apply it with tile cement. This creates a cuddle wall or comfortable seat. TIP: By installing more capacity than it is no longer necessary to install a separate radiator and the MAGNUM Mat can serve as the main source of heating. This allows more space for fixtures or furniture. The capacity must match the heating requirements / calculations for the space in question.
12. Connecting the thermostat:
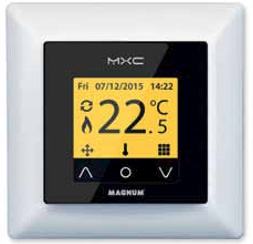
Installation needs to be done by a qualified electrician in accordance with all current wiring and building regulations. Before installation or re-installation of the thermostat always isolate the power to the thermostat. Check if the power is off. Remove the display frame by pushing a non sharp instrument (for example the point of a ballpoint pen) carefully in the square whole underneath the thermostat. The display frame and the cover frame can be removed.
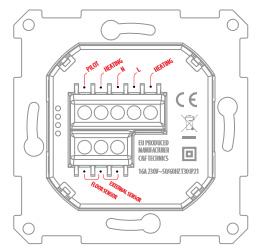
| PILOT: | Pilot Wire (Domotica) |
| HEATING (N): | Heating Cable connection (N) |
| N | Power connection (Neutral) |
| L | Power connection (Live) |
| HEATING (L): | Heating Cable connection (L) |
| FLOOR SENSOR | Floor sensor connections |
| EXT. SENSOR | External sensor connections |
EARTHING: We advice to make an external earth wire connection from the thermostat with the supplied terminal block. Position the thermostat and install onto the back box (not supplied). Place the display frame back into position by pushing it softly. To install and set up the thermostat, please use the manual that is included with the thermostat.
13. Using the system for the first time:
Depending on the drying time specified for the Flexible adhesive or self-levelling compound, however not sooner than 21 days after installation due to the natural expulsion of moisture from the floor. Turning on the system sooner can damage the floor. Please use the “Slow start-up” mode on your thermostat.
Documents available below are available to everybody for free to download. They can be open in high quality on your computer and be printed for further use.
![]() Magnum Heating Mat Manual
Magnum Heating Mat Manual
![]() Magnum Heating Mat Fitting instructions
Magnum Heating Mat Fitting instructions
![]() Magnum Heating Mat Datasheet
Magnum Heating Mat Datasheet
![]() Magnum Heating Mat Technical specification
Magnum Heating Mat Technical specification
![]() VDE Approval
VDE Approval

Certified Trust and Exceptional Service
Since obtaining our Trustmark on 18 May 2015, wetroomsdesign.co.uk has consistently demonstrated its
commitment to being a trustworthy online retailer. Our excellent customer reviews are a testament to
our focus on rapid delivery, facilitated by our UK-based warehouse. Stocking thousands of products
available for next-day delivery ensures that you receive your purchases promptly. Additionally, our
dedicated customer service team is always ready to assist you during and after your order, enhancing
your shopping experience. With Trusted Shops Buyer Protection up to £2,500, every purchase is
securely backed, ensuring peace of mind with every transaction.
Product Reviews This tab features detailed reviews of the product you are viewing, offering firsthand insights from customers who have experienced its benefits. While the product available on this page may have similar features to other items in our range, each review specifically addresses this particular model, which is available in various sizes to suit diverse needs and preferences. These reviews provide valuable information to help you make an informed decision, highlighting the distinct characteristics and quality of each product uniquely available here.
No reviews


