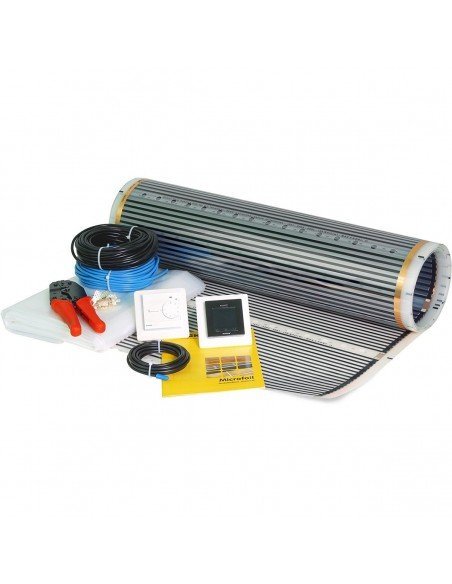
Wood, parquet and laminate are all sustainable and attractive products that are increasingly used. The demand for a heating system for these floors has lead to the design of new, technologically high quality product. MAGNUM now offers a solution for these "dry" floors. The MAGNUM Electric Heating Foil 5 m² 60 cm x 8.4 m can be applied directly underneath wood, parquet or laminates. The extremely thin floor warming system (only 3 mm!) is controlled via a digital clock thermostat with a floor sensor. This ensures very even warming up. The floor temperature be limited to a specific maximum temperature by way of a floor sensor and thermostat.
The advanced thermostat takes account of the required warming up period, so that your floor is always at the right temperature when you want it. The foil should be put on top of a 6 mm thin polystyrene insulation plate (MAGNUM Isofoam). This insulation plate ensures extra heat insulation and also has noise dampening properties.
MAGNUM Foil is very simply made to measure. Safe, comfortable and easy to use: MAGNUM Foil also provides a comfortable living and working climate on dry floors!
Based on current settings, if you Add to cart current set and then order, you will receive the following items:
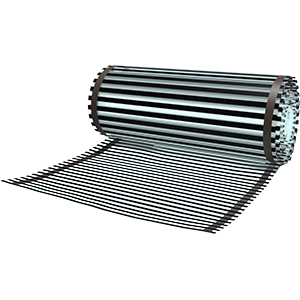
Underfloor heating foil
Main heating element. Installed below the floor covering to convert electring current into warmth.
3 mm thick
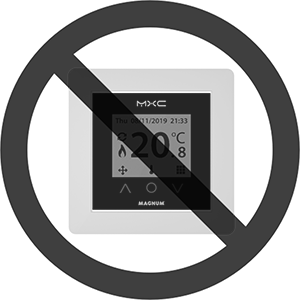
Control device
Control device. One can manage up to 23 m² / 16 amps. At least one should be included to every order.
Thermostat: Not included

Floor sensor
Magnum Probe Sensor measures current temperature of the floor, allows the thermostat to adjust the heating power.
Floor probe
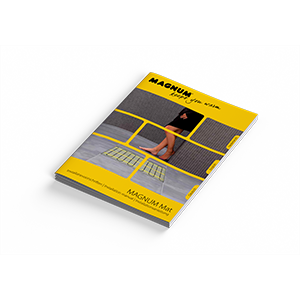
Instructions & guide
Fitting instructions for Magnum heating kit with control check useful to measure voltage during installation.
for fitting and using
Underfloor heating Foil set consists of all necessary parts for installation. To choose proper size, bear in mind that foil can be cut every 20 cm, so you can choose either 10 m² and have not entire desired area heated or 15 m² and cut surplus of mat off. Foild should not be laid under heavy bathroom appliances (like bath) or furniture and not closer than 15 cm from the walls.
MAGNUM Foil is supplied as set and contains:
• Foil on a roll of 5, 10 or 15 m² (120 watt/m²)
• Flexible sensor tube
• Insulation tape
• Connection terminals
• Connection leads
• Clear step-for-step installation instruction
• Pressure distribution and crimping pliers
Guarantee:
10-year guarantee covering the electromechanical operation of the MAGNUM Foil and
two years covering the thermostat and the floor sensor.
System testing:
In accordance with the latest European standards: SEMKO, CE marking (low voltage
directive 73/23/EEC and 93/68/EEC/ EN60335-2-96:2002+A1).
| Product | Size | Power | Price (tax included) |
| MAGNUM Foil 5 m² | 60 cm x 8.4 m | 600 Watt | £ 210 |
| MAGNUM Foil 10 m² | 60 cm x 16.8 m | 1200 Watt | £ 361.20 |
| MAGNUM Foil 15 m² | 60 cm x 25 m | 1800 Watt | £ 544.80 |
- Coverage
- 5 m²
- Thickness
- 3 mm
- Additionals
- Thermostat · Isofoam 6 mm
- Heating Power
- 600 Watt
- Roll width
- 600 mm
- Set consists
- Foil · Connection wires · Crimp connections · Crimp tool · Insulation PVC tape ·PP tape ·Flexible sensor tube · Installation guide
- Size
- 60 cm x 8.4 m
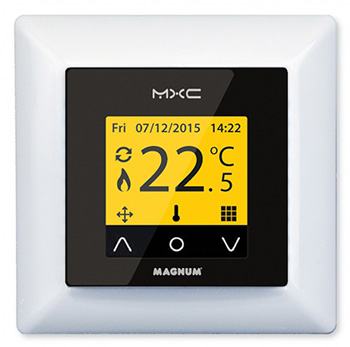
This stylish, colourful and refined digital clock thermostat has been specially designed for electric heating systems. The MAGNUM X-treme Control is supplied with every MAGNUM floor heating set (Mat,Cable and Foil types), including external floor sensor, a built-in air sensor and three different frames that suit most brands of switching equipment. The MAGNUM X-treme Control is simple and intuitive to operate using touch sensitive buttons under the display. The new chameleon function is simple to adapt to the colour of your interior. The stylish screensaver shows the time, temperature and current mode without touching the thermostat. The MAGNUM X-treme Control has a new help function that appears after 10 seconds in the menu with a complete description of the setting in question. The MAGNUM X-treme Control also has a wooden floor function whereby the temperature is limited to 28°C. This makes the MAGNUM X-treme Control the idea and safe solution for every electric heating system.
Specification:
- Voltage: 230 Volt - 50/60 Hz
- Maximum capacity: 16A - 3600 watt
- Temperature range: +5 to +40°C
- Frame: IP21
- Color: Polar white (RAL 9010)
- Testing: FI/CE
Technical details:
- Control via touch sensitive keys
- Chameleon function (8 colour themes)
- Screensaver night clock
- Automatic start-up menu
- Slow start-up function
- Wooden floor function (28 °C limit)
- Built-in help function
- Automatic summer and winter times
- Multi-programme function (2 periods per day)
- Programming multilingual
- Including floor and air sensors
- Multi-frame adapter system for: Gira, Jung, Elko, Merten, Busch Jager, etc.
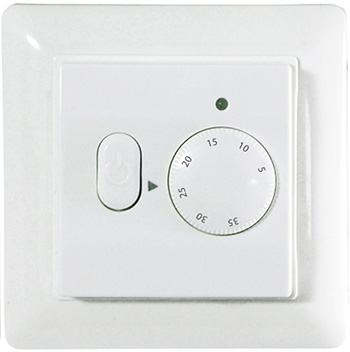
In some situations the digital regulation is not required and so the preference is for a simple on/off operation. Specifically industrial applications where the heating must remain on at all times. Therefore MAGNUM has designed the Standard Control: a simple on/off thermostat with temperature regulation that is clearly easy to operate.
Specification:
- Voltage: 230 Volt - 50/60 Hz
- Maximum load: 16A / 230 V
- Temperature range: +5 to +40°C
- Housing: IP21
- Color: Polar white (RAL 9010)
- Testing: CE
Technical details:
- On/off thermostat complete with temperature regulation
- Including floor sensor
- Integral room sensor and floor limit sensor
- Multi frame adapter system for: Gira, Jung, Elko, Merten, Busch Jager, etc.
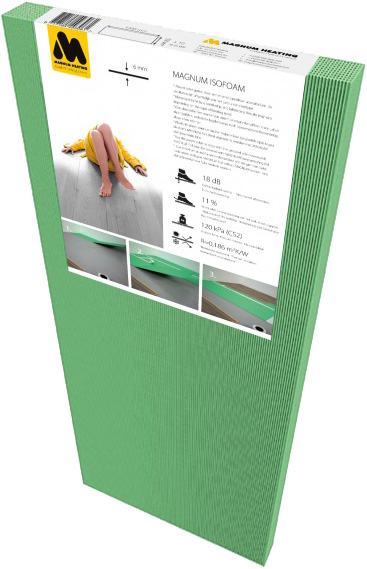
MAGNUM Isofoam at only six millimetres is a very thin floor insulation manufactured entirely from recycled materials. The structure of MAGNUM Isofoam is formed from small enclosed cells that have excellent insulation properties. The special structure ensures that no heat is lead underneath, so that all the heat generated by the MAGNUM Foil heads for the surface of the floor.
MAGNUM Isofoam 6 m² is supplied as 10 plates 120 x 50 cm x 6 mm.
Technical details
- Lightweight
- Optimal noise reduction
- Excellent heat insulation
- Levels out small unevenness in floors
- Easy to lay and cut
- Only 6 mm thick
- Suitable for MAGNUM Foil
| Water resistance | 0.06% |
| Temperature resistance | -30 to +70 °C |
| Noise insulation | Above floor -5.6 dB • Under floor -21 dB |
| Compression strength | 6 t/m 2 |
| Insulation value | 0.0279 W/mK |
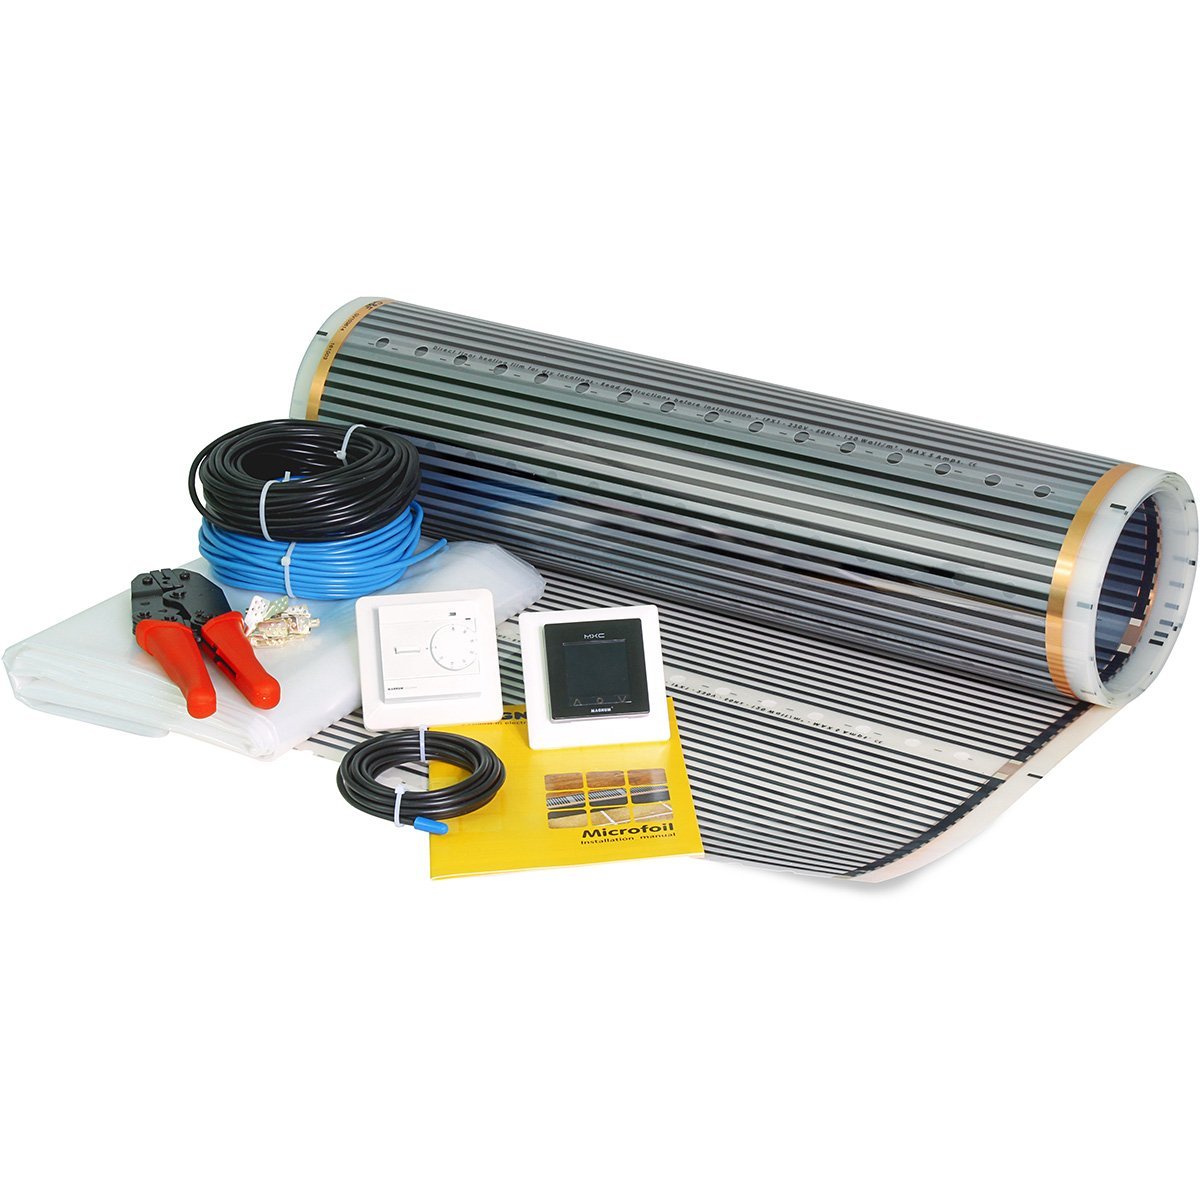
The Magnum Microfoil is manufactured from high quality, durable materials. To guarantee that your product functions optimally there are a few points of attention which are described in the Installation Instructions. We can only offer you the full guarantee if the Microfoil is correctly installed in accordance with the Installation Instructions. Carefully read the instructions prior to installation, do not forget the yellow centre page when doing so, and ensure that you have the correct tools and materials. The electrical installation must be carried out by a qualified electrician in accordance with IEE Regulations.
1. Checklist
- MAGNUM Microfoil
- MAGNUM Intelligent-control digital clock
- Thermostat with floor sensor
- Connection wire black/blue
- Crimp Connections
- Crimp Tool
- Insulation PVC tape
- PP tape
- Flexible sensor tube
- Installation guide
- Age resistant Polyethylene film 0.2 mm
- MAGNUM Isofoam 6mm Polystyrene
- (PS) insulation - Back box for thermostat
2. Points of interest:
Please read the instructions carefully before starting installation!
- MAGNUM Microfoil heating foil may only be installed in dry places, IPX1
- Magnum Microfoil heating foil may only be used as sub heating. There should always be another heating element with sufficient capacity that can be used at the same time. Keep windows and doors closed during heating periods.
- The ambient temperature where the Microfoil is installed should be above 5 degrees Celsius.
- The heating foil should always be installed together with an RCD.
- The heating foil should be placed on 6mm (minimum) polystyrene insulation.
- A 0.2 mm age resistant PE film should be placed over the heating foil before installing the laminate flooring.
- The heating foil must not be placed under fixed furnishing such as wardrobes, innerwalls, kitchen units etc, as this will cause overheating.
- The heating film should be separated from other heat sources like lights and chimneys. The distance should be at least 30 cm.
- The floor covering must have a minimum thickness of at least 5mm, but must not have higher thermal resistance than 0.17 W/m²K.
- Thick rugs or other insulating materials should never be placed on a floor with electrical heating.
- The thermostat needs to have the floor sensor properly installed to work.
- The maximum current distributed through each length of heating foil is 5 A.
- The Magnum thermostat can switch up to 16 A. When switching above 16 Amps a Contactor must be used.
- The temperature in the room is controlled with a room thermostat and the floor sensor protects the floor from getting hotter than 28 degrees Celsius for maximum safety and comfort.
- The heating foils should be connected with a double insulated cable (supplied).
- Please visually check the Microfoil for creasing or folding that may of happened during transit. Any such damaged areas must be discarded.
- The heating foils can only be fixed with the tape that is included in the installation kit.
- Warning: The parquet, laminate, or wooden flooring must have a minimum thickness of 5mm and a maximum thickness of 22 mm. When there is another thickness or any doubt whether the wood can be used in combination with floor heating, please contact the manufacturer of your wooden flooring.
3. Guarantee:
Installation must be carried out by an approved fully qualified electrician. Only installation fitted in accordance with this manual will give you 10 years guarantee on the electro technical use of the Microfoil and 2 years on the thermostat and the floor sensor.
4. Important points of interest:
WARNING: The MAGNUM heating foil requires a 230V supply and the installation must be carried out by a qualified electrician. The electrical installation should be carried out in accordance with the national regulations.
The rating of the heating foil must comply with the rating of the thermostat, the circuit breaker and if needed the contactor. Good wiring practice must be observed. Installation must comply with current building and wiring regulations.Connection cables must not come in contact with the heating foil. The heating foil must be installed together with a Residual Current Device (RCD) with a maximum breaking current of 30mA.
5. Installation Planning:
Before installing the heating foil, make a sketch or drawing of the installation.
- Plan where the thermostat should be placed. The thermostat should not be placed in direct sunlight. It must be convenient for the user and near to the electrical supply, at a height of 1.2 m approx.
- Plan where the wiring and the connection to the electrical supply should be placed.
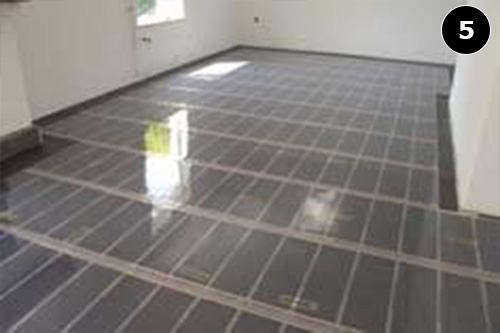
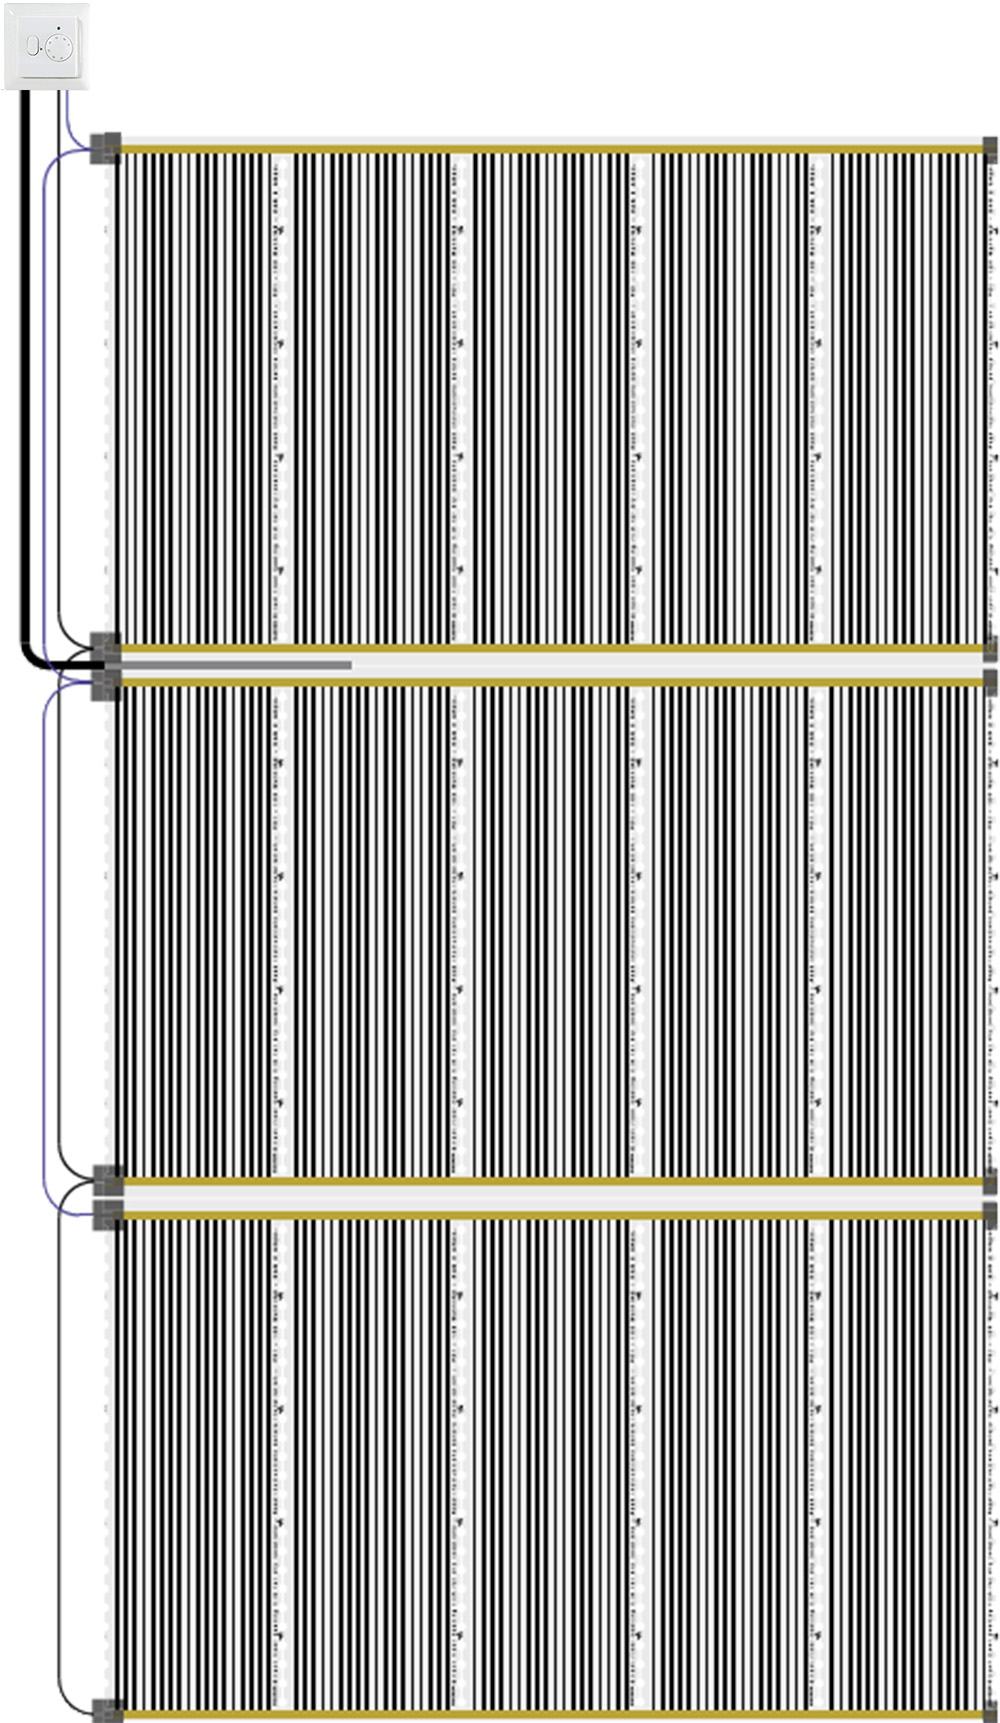
- Plan the layout for each heating foil panel. The heating foil must be placed side by side with no gaps. The heating foil must cover as much floor area as possible.
6. Installation procedure:
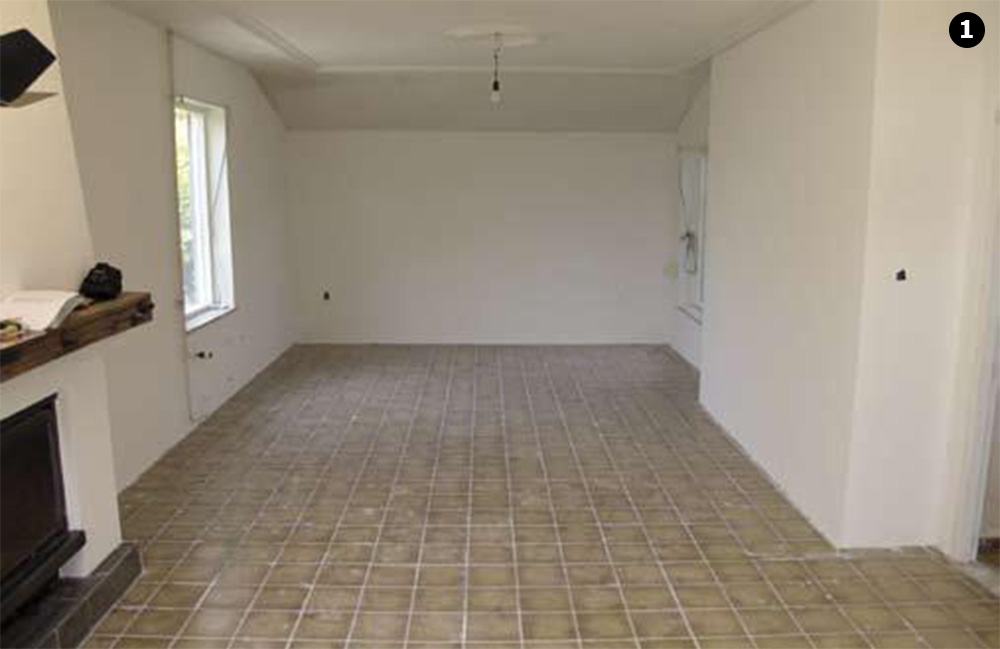
- Make sure the floor is clean and free from dust. (Pic. 1)
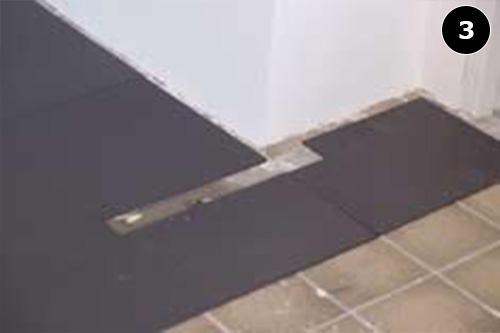
- Cut a track in the wall and the floor for the thermostat & floor sensor, make a smooth bend at floor level for the sensor conduit. The track for the conduit must be 50cm from the wall (Pic. 3).
- Push the floor sensor into the conduit. The tip should be visible at the end of the conduit, but it may not stick out. Place the sensor in the middle of two rows of heating foil.
- Cover the end of the conduit with the small grey cap, which is supplied with the system.
- Install the flexible conduit with a smooth bend at the floor level.
- Check the surface of the floor. To prevent damage it is important that the surface is flat and clean. The maximum height difference that is permitted is +/- 1 mm.
- If the floor is uneven then it is highly recommended that the floor is levelled using a suitable self levelling compound.
- Fill up the track in the wall & floor with suitable filler.
- Make sure the surface is clean, dry and free from grease.
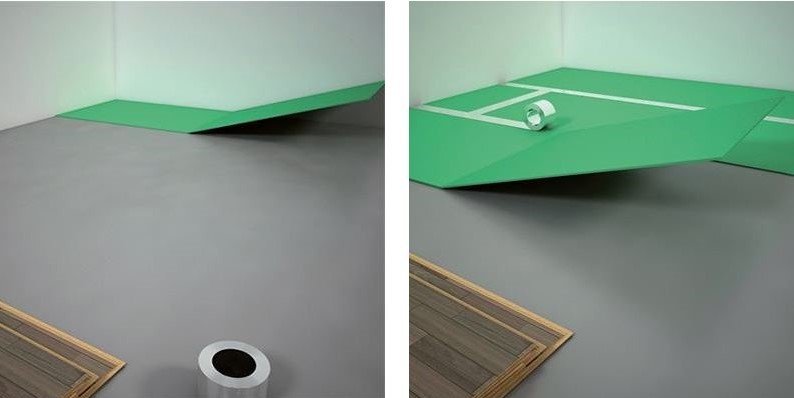
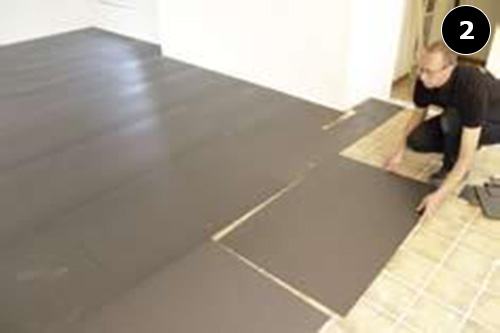
- Lay the MAGNUM Isofoam floor insulation, it must cover the whole surface (Pic. 2).
- Tape all joints to prevent any movement between the panels. Leave a 30 mm gap for cables along the edge where the connections will be made. Make sure that the surface is clean and that no sharp objects can come into contact with or drop down onto the heating foil during the installation. Plan your work in a way that you don’t have to step directly on the heating foil.
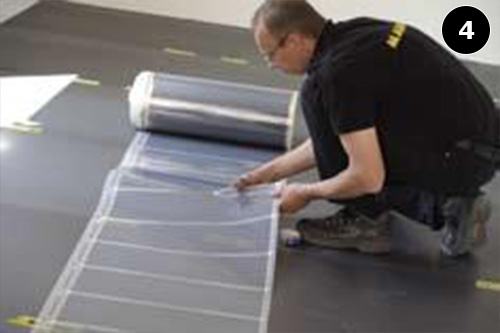
- Roll out the heating foil along the edge of the room. The copper can face either up or down. Make sure that the heating film is completely flat without any creases.
- Cut the foil only along the perforation.
- Cover the blind copper ends with a 50 x 50 mm PVC tape.
- Roll out the heating foil parallel to the first panel, they must not overlap.
- Tape the foils to the insulation to avoid movements during the floor installation and service.
7. Connect the wires
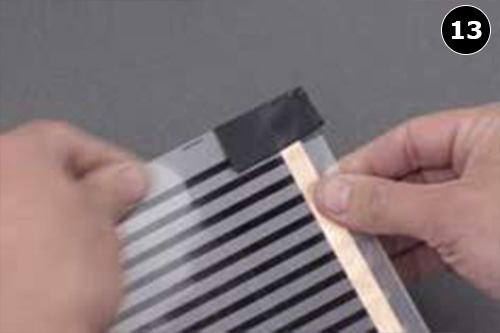
- Once the total floor surface is covered with the heating foil, the wires can be connected. On the side where no connections are made, tape all the copper conductors with pieces of PVC tape (Pic. 13). Protect the heating foil with left over MAGNUM Isofoam PS insulation while you are working with connections.
- To protect the crimp connection:
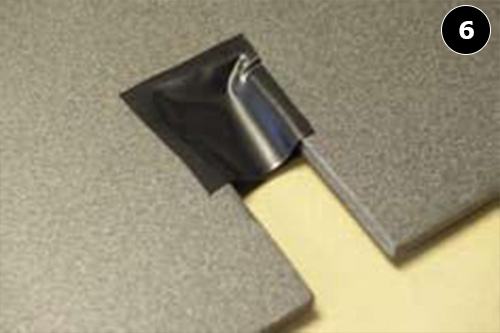
- Make a 3x6 cm cut-out in the Isofoam just below the connection point (Pic. 6). Put a piece of PVC tape on the backside of the PS insulation. The crimp connection must not protrude above the surface of the PS Insulation to guarantee a good contact between the heating foil and the (wooden) floor.
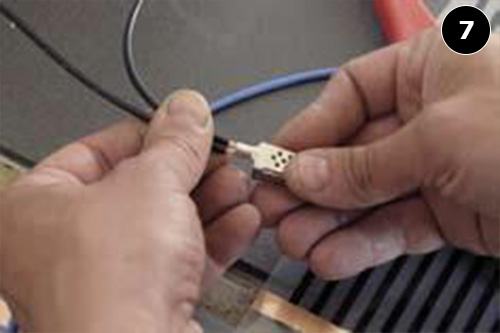
- Cut off 6mm of PVC insulation at the end of the cable, if only one cable is connected, fold the cable to fit into the connector crimp (Pic. 7).
- Connect the cables to the connector crimps:
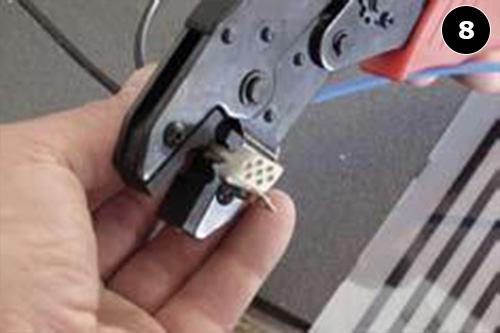
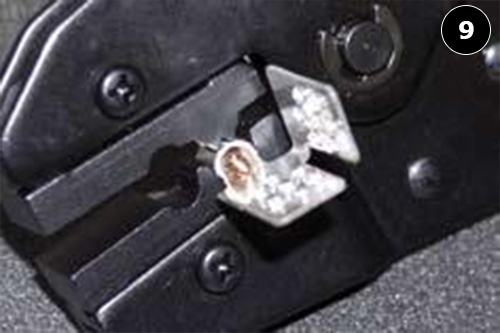
- Tighten the connector by using the crimp tool (Pic. 8). Attention: In case of a single connection cable (first connection), always fold the cable double! Always tighten on both sides (on top and under) the wires to the connector (Pic. 9). Cables must be long enough and free to move and not be subjected to mechanical loads.
- To connect the crimp to the heating foil:
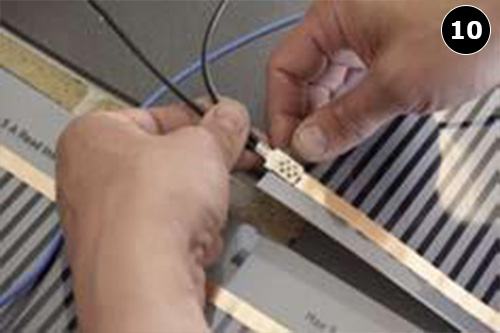
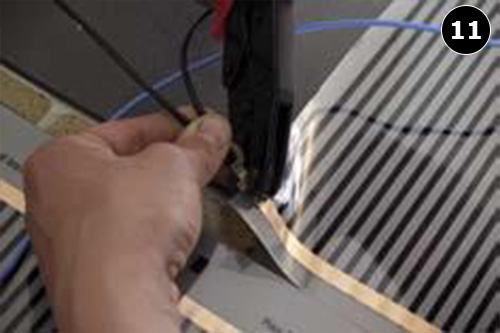
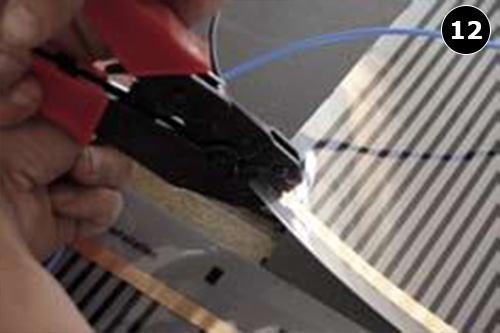
- Make sure that the crimp connection is correctly set, max gap 1.3mm. Place the crimp over the copper band on the heating film. Tighten the crimp by hand (Pic.10). Then tighten the crimp with the crimp tool in a 45 degree angle from both sides (Pic. 11 and 12).
- Connect the heating foils in parallel with the double insulated cable.
- To insulate the crimp connection:
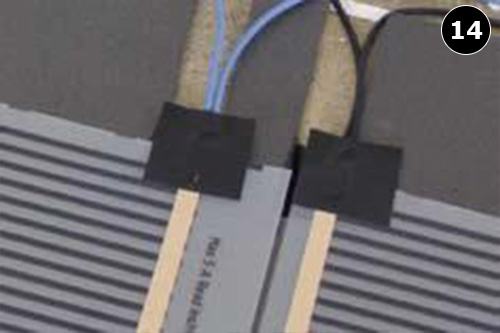
- Cut out 2 pieces of 50x50mm PVC tape. Place it on both sides of the crimp connection. The tape must end at least 5mm from the edge of the crimp (Pic. 14).
8. Testing the installation.
- All heating foils must be connected during the test.
- Measure the overall resistance for the heating foils and note this in the protocol under Measured resistance before covering the floor
- Calculate the actual power with formula: Actual power=52900/Measured resistance ; note in under: Actual power
- Measure the total length of the heating film and calculate the Total Rate Power with the formula: Total Rate Power = total length x rated in W/m (printed on the heating foil) Note that under: Total Rated Power
- Make a sketch or take a photo for documentation of the installation on the middle page.
9. Cover the Microfoil:
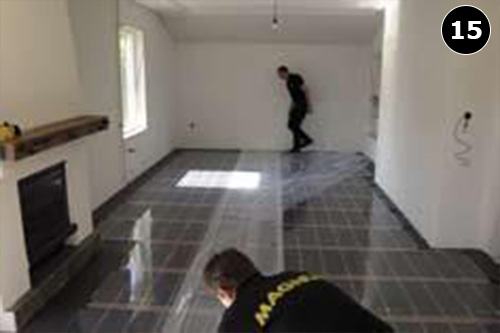
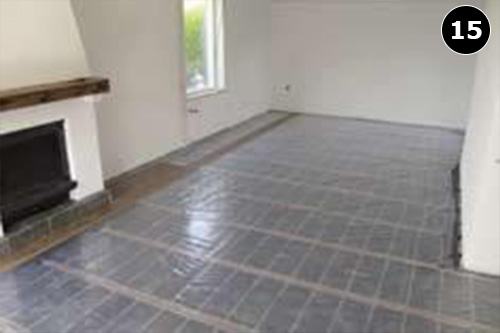
- Cover the microfoil with age resistant PE foil with a minimum thickness of 0.2 mm. Film must overlap 200 mm if it is necessary to use several sheets to cover the surface (Pic. 15).
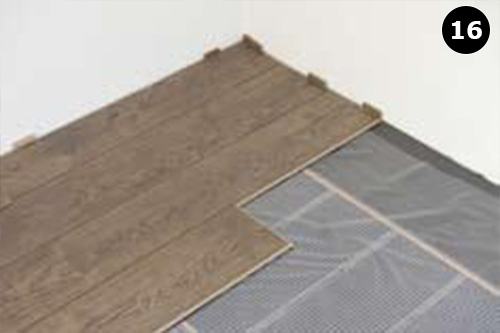
- Install the laminate flooring according to the manufacturer’s instructions. Please work with light footwear. Protect the heating foil, cables and connections with some spare Magnum Isofoam PS insulation (Pic. 16 and 17).
- Measure the overall resistance of the heating foils and note it in the protocol under: Measured resistance when floor covering is installed. This protocol should be filled in completely. In case of a technical problem, the manufacturer will ask for this protocolcard. Connect the thermostat according to the instructions in the thermostat manual. The thermostat must be limited to a maximum floor temperature of 28 degrees Celsius.
10. Connecting Intelligent-Control
Before installation or de-installation always turn off the electricity in the meter cupboard. Installation must be done by an approved electrician in accordance with the current regulations. The MAGNUM Intelligent-Control has an intelligent guide function which guides the user through the program and is very friendly in use. However study the manual very well before installation and keep it with the other guarantee papers.
10.1 Notes for installer:
Check if the power is turned off. Take off the display frame by pushing with a non sharp tool (for example a ballpoint) in the square whole on the underside of the thermostat frame. The display frame and cover frame can then be taken off.
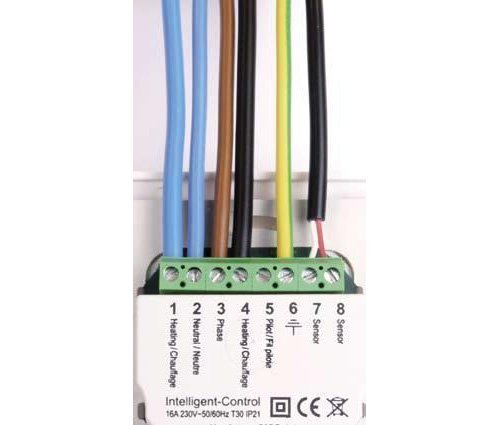
10.2 Connection schedule:
- Terminals 1 and 4 are used for the connection cables of the heating foil.
- Terminals 2 (Neutral) and 3 (Live) are used for the power supply.
- Terminal 5 is only in use in case of an external central control system
- Terminal 6 is used for the earth of the electrical power.
- Terminals 7 and 8 are used for connecting the sensor.
10.3 Fix to Back box:
The back box must be at least 35mm deep. Position the thermostat and fix it to the back box with 2 screws. Replace the cover frame and push the display frame back.
10.4 Setting the Intelligent-Control:
Attention: After switching the power on for the first time, it will take 5 minutes until the first question appears on the screen. This is due to the internal back up battery charging. Follow the start-up wizard menu carefully. For the settings of the thermostat we advise you to follow the instructions in the thermostat manual.
The thermostat needs to be set at a maximum temperature at 28 degrees Celsius.
Documents available below are available to everybody for free to download. They can be open in high quality on your computer and be printed for further use.
![]() Magnum Heating Foil Manual
Magnum Heating Foil Manual
![]() Magnum Heating Foil Datasheet
Magnum Heating Foil Datasheet
![]() Magnum Heating Foil Technical specification
Magnum Heating Foil Technical specification
![]() VDE Approval
VDE Approval

Certified Trust and Exceptional Service
Since obtaining our Trustmark on 18 May 2015, wetroomsdesign.co.uk has consistently demonstrated its
commitment to being a trustworthy online retailer. Our excellent customer reviews are a testament to
our focus on rapid delivery, facilitated by our UK-based warehouse. Stocking thousands of products
available for next-day delivery ensures that you receive your purchases promptly. Additionally, our
dedicated customer service team is always ready to assist you during and after your order, enhancing
your shopping experience. With Trusted Shops Buyer Protection up to £2,500, every purchase is
securely backed, ensuring peace of mind with every transaction.
Product Reviews This tab features detailed reviews of the product you are viewing, offering firsthand insights from customers who have experienced its benefits. While the product available on this page may have similar features to other items in our range, each review specifically addresses this particular model, which is available in various sizes to suit diverse needs and preferences. These reviews provide valuable information to help you make an informed decision, highlighting the distinct characteristics and quality of each product uniquely available here.
No reviews


