
Your cart
There are no more items in your cart
Complete waterproofing guide for wet rooms DIY with BASF PCI® solvent-free, fast curing, high quality chemicals. Protect your shower against moisture or mould before lying your tiles.
1. Preparation
procedure for all types of floors and walls.
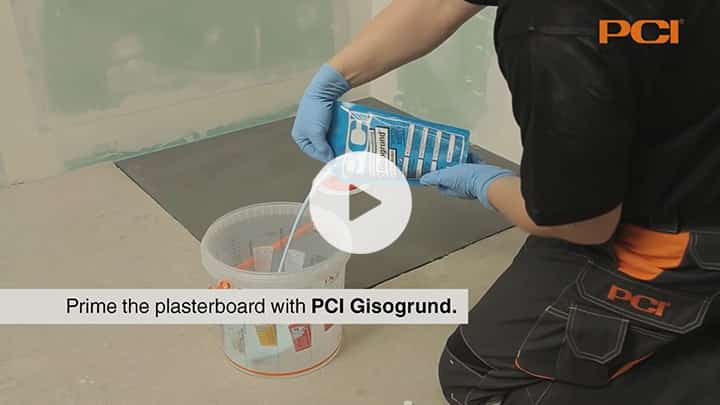
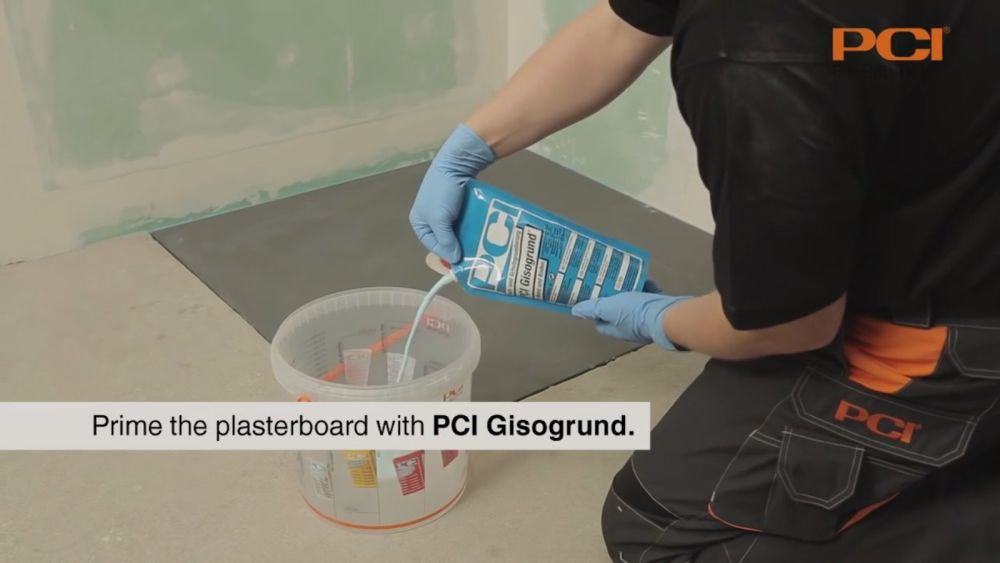
2. Priming
walls and exterior surfaces seals the area and prolongs the wet edge of finished coats.
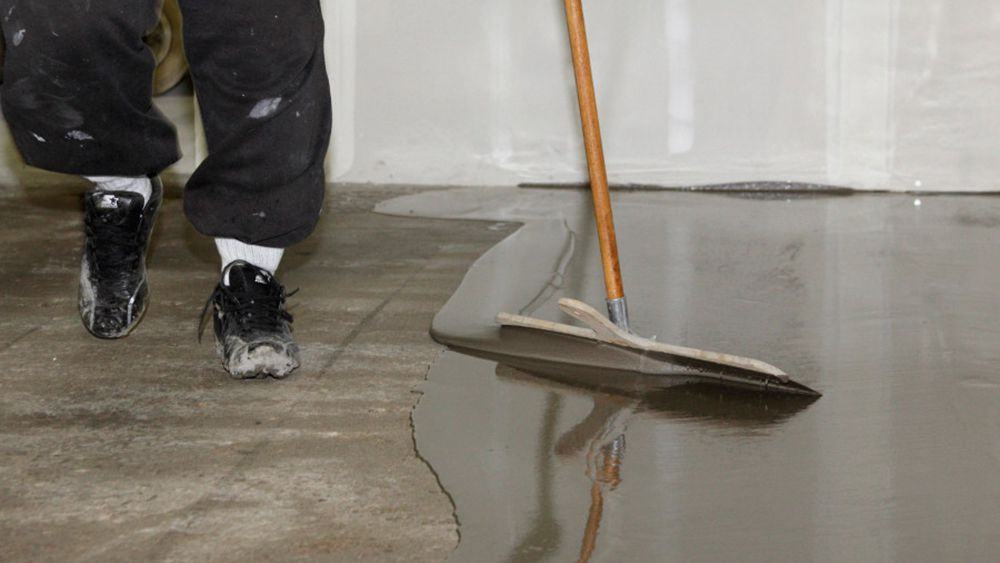
3 .Floor levelling
is used to even and eliminate any roughnesses on floors and walls.
4. Tanking
is effectively a liquid coating that bonds to damp masonry and then cures to form a waterproof barrier.
5. Waterproof membrane
is a fabric, which is main protection against moisture. Should be laid on all connections
and gaps between different parts of shower area.
6. Tile adhesive
is the substance used to long-term hold the tiles to the floors and walls.
7. Grout
is a particularly fluid form of concrete used to fill gaps. It is used to seal joints such as between tiles.
8. Joint sealant
is used to seal corner joints, movement joints and connection joints in sanitary areas, on
balconies and terraces. They enable the relative movement of the structure’s components and prevent the ingress of water, wind or chemicals.
1. Preparation procedure for all types of floors and walls.
The substrate must be structurally sound, clean and able to bear weight. Remove oil stains, residues which could impair adhesion such as waterproof adhesive residues, cement paste and dirt very thoroughly. Newly applied cement screeds must have a moisture content level not exceeding 4%, rough-ground anhydrite and/or gypsum based screeds not more than 0.5% (measured with CM meter).
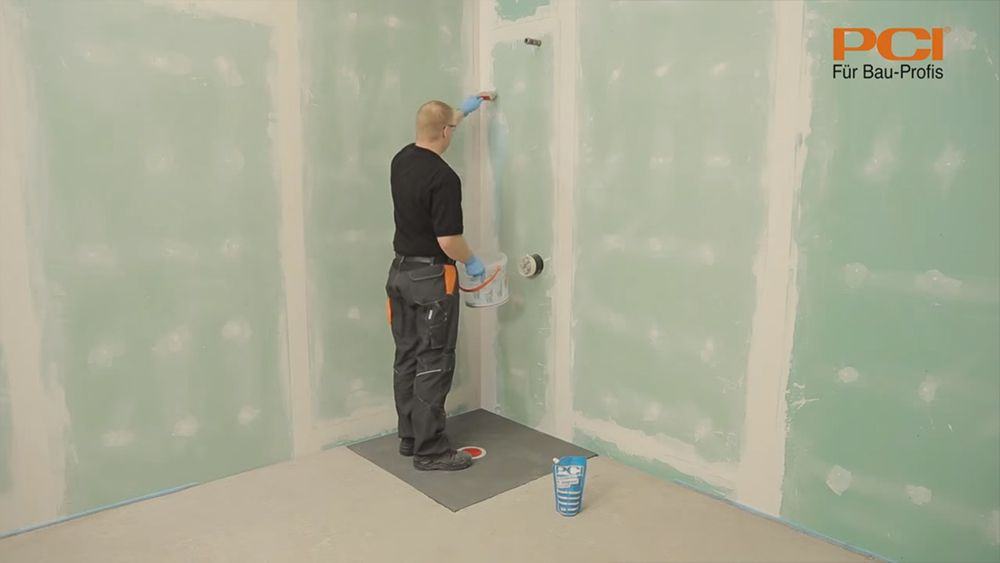
2. Priming walls and exterior surfaces seals the area and prolongs the wet edge of finished coats.

Gypsum based substrates, anhydrite screeds, mastic asphalt screeds, xylolith screeds as well as screeds with old adhesive residues (not suitable with water soluble adhesive residues, e.g. sulphite liquor adhesives)
Gisogrund®
Walkable: 30 - 60 min • Second coat: 30 - 60 minutes • Subsequent coat: 60 - 180 minut
- Stir PCI Gisogrund well prior to the application (and/or shake 1 litre bag well).
- Apply a sufficient quantity of undiluted PCI Gisogrund by brush or float to achieve a uniform coat. Avoid puddles forming!
- Check strengthening and curing by scratching the surface. Do not apply tile adhesive, wallpaper, paint, plaster or PCI Periplan before PCI Gisogrund is dry.
Absorbent mineral substrates, e.g. concrete, cement screed, gauged render, aerated concrete, limestone or similar.
Gisogrund®
Walkable: 30 - 60 min • Second coat: 30 - 60 minutes • Subsequent coat: 60 - 180 minut
- Stir PCI Gisogrund well (and/or shake 1 litre bag well), dilute 1 : 1 with water and mix thoroughly.
- Apply a sufficient quantity of diluted PCI Gisogrund by roller, brush, broom or float to achieve a uniform coat.
- In case of very absorbent substrates, it is recommended to apply a second coat of PCI Gisogrund, diluted 1 : 1 with water, to achieve a more intensive strength and to avoid blowholes forming. Do not apply the second coat until the first one has completely cured.
- Do not apply tile adhesive, wallpaper, paint, plaster or PCI Periplan as floor leveller before the primer is dry (scratch proof).
Wooden and wood-base materials surfaces, plaster boards, paint coating, finish material and cementous floor leveler.
Gisogrund 404®
Walkable: 3 h • ready for application of floor leveller 3 h (anhydrite 12 h)
- Shake PCI Gisogrund 404 well before use.
- Pour primer onto the clean and prepared substrate and spread in crisscross method using a fine-pored foam roller, surface scraper, soft brush or flat bristle brush. Avoid puddles forming! A second coat of primer can be applied when the first coat is walkable. Use particle filter mask P2 for spray application.
- Floor levellers and tile adhesives to lay ceramic coverings can be subsequently applied to the cured and walkable primer. The waiting time of 12 hours must be observed for anhydrite substrates.
3. Floor levellers are used to even and eliminate any roughnesses on floors and walls.
Cementitious substrates, calcium sulphate screeds, magnesite screeds, mastic asphalt screeds, non-absorbent substrates
PCI USP 32®
Walkable: 3 hours • grindable: 1 day • Coverable: 1 day at 2 mm layer
- Pour cool gauging water in a clean mixing vessel, add USP 32 and mix with a suitable paddle (e.g. from Collomix) for at least 3 minutes until free of lumps. It is important to adhere to the indicated amount of gauging water when mixing USP 32. Additives are not allowed.
- Pour USP 32 onto the cured primer and spread to the required layer thickness using a trowel or pin leveller. De-aerate with a spiked roller during the installation. The minimum layer thickness must not be less than 2 mm all over the entire surface when parquet or laminate flooring is glued on to USP 32.
- If a second layer is required it should be applied onto the first layer while still moist.
For floors, walls and overhead application. On concrete and masonry, gauged render and render, plasterboards and plaster, existing ceramic tiles. Base coat and/or levelling coat on masonry before applying rubbed-finished render, scratch render or polymer render. For levelling and repairing irregular wall surfaces before tiling.
PCI Pericret®
Drying: 30 - 40 minutes • Tileable: 2 h
- Fill water in a clean mixing bucket and add the required quantity of PCI Pericret while mixing with a suitable paddle (e.g. from Collomix) attached to a high-speed electric drill until a lump-free, plastic consistency is produced.
- Using a finishing trowel, apply a thin scratch coat with PCI Pericret to the clean substrate before applying the mortar to the entire surface.
- PCI Pericret can be applied in one layer to a thickness of 50 mm (for break-outs) and 30 mm (for surfaces).
- When the mortar has initially set (approx. 30 to 90 minutes depending on layer thickness, substrate and working temperature), PCI Pericret can be rubbed down with a damp felt board or sponge float (Moltopren sponge, porous) or smoothed with a finishing trowel or short double plane if necessary.
- The substrate must be prewet and protected against rapid drying in high temperatures, wind and direct sunlight (e.g. repeated sprinkling with water, covering with jute or PE foil).
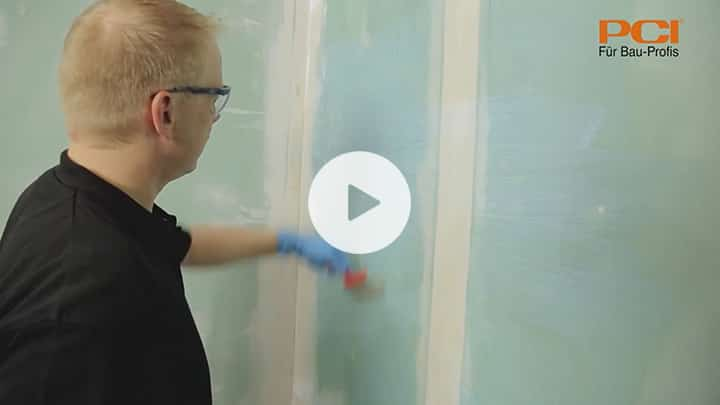
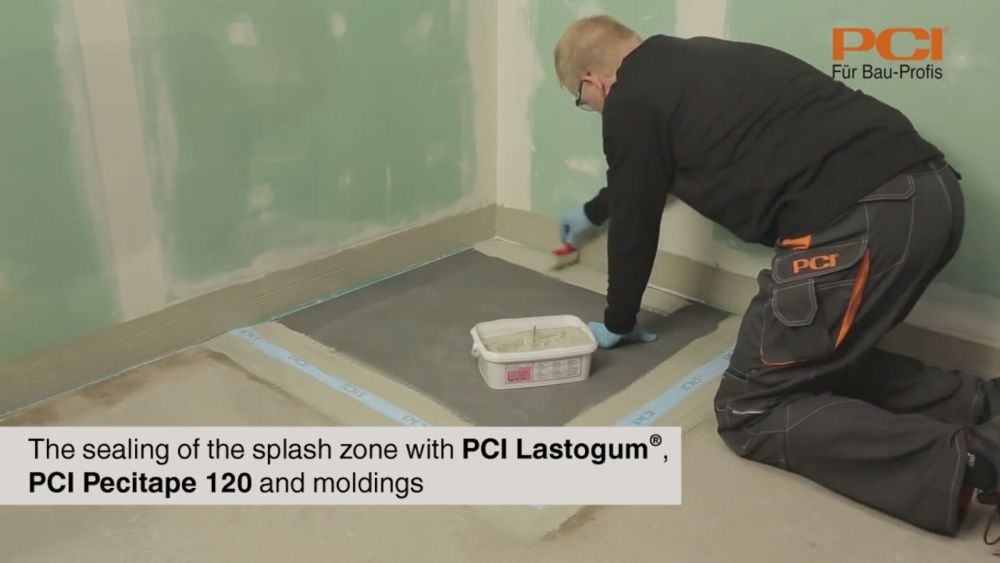
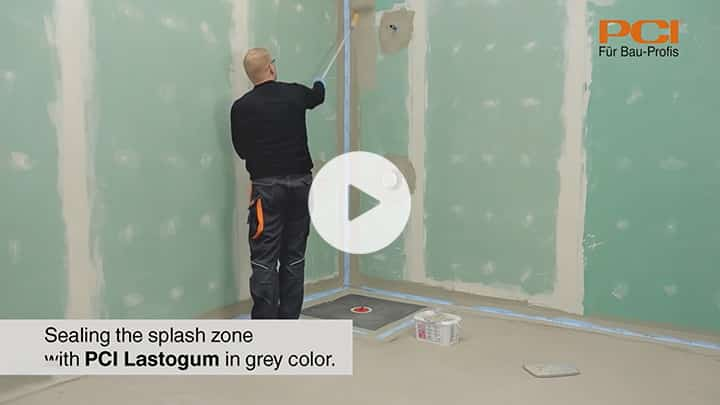
4. Tanking is effectively a liquid coating that bonds to damp masonry and then cures to form a waterproof barrier.
On moisture-sensitive, absorbent substrates, e.g. plaster, gypsum blocks, gypsum fibre boards, plasterboards, particle boards, anhydrite screeds in moist and wet areas subject to usual domestic use. On mineral absorbent substrates, e.g. concrete, screed, render, aerated concrete, cementitious wall levellers such as PCI Pericret.
PCI Lastogum White® • PCI Lastogum Grey®
Evaporation 1st layer: 1 hour • Evaporation 2nd layer: 1 to 2 hours
- Apply undiluted PCI Lastogum by roller (lambskin roller), brush (wall brush, float), or trowel to the substrate covering the entire surface. A minimum of two layers is required.
- Place PCI Pecitape 10 x 10 and/or PCI Pecitape 42.5 x 42.5 over pipe culverts and floor drains, in corner joints and floor/wall junctions press PCI Pecitape 120 into the first layer of PCI Lastogum. Projecting edges of the fabric are covered by the second layer.
- Any further layer is applied when the first layer is dry. We recommend to apply the first layer with PCI Lastogum grey and the following layer(s) with PCI Lastogum white for better coverage control. The applied layer is too thin if the previous colour is visible; this should be avoided.
- When PCI Lastogum has cured, tiles and flagstones can be laid on vertical and horizontal areas using PCI Nanolight.
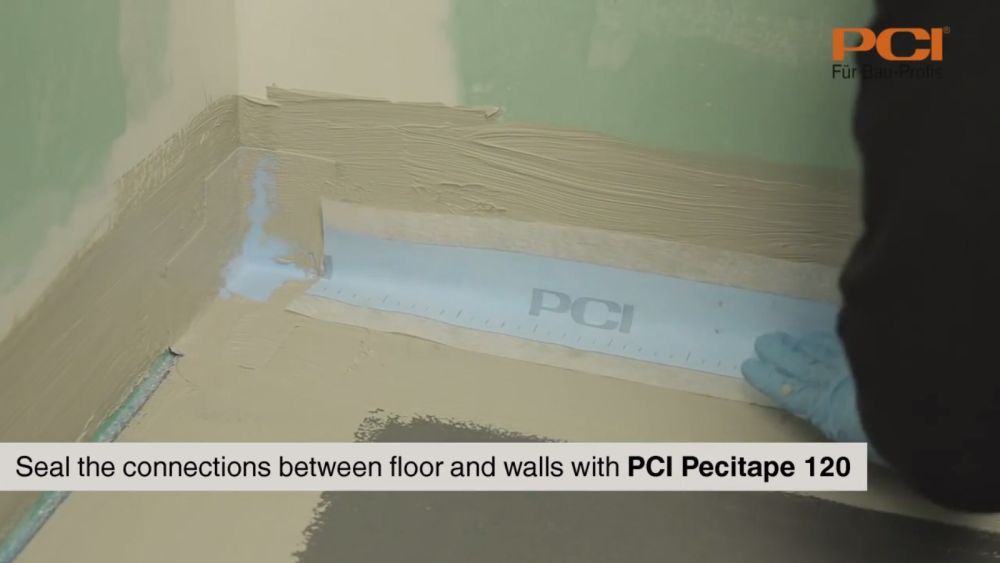
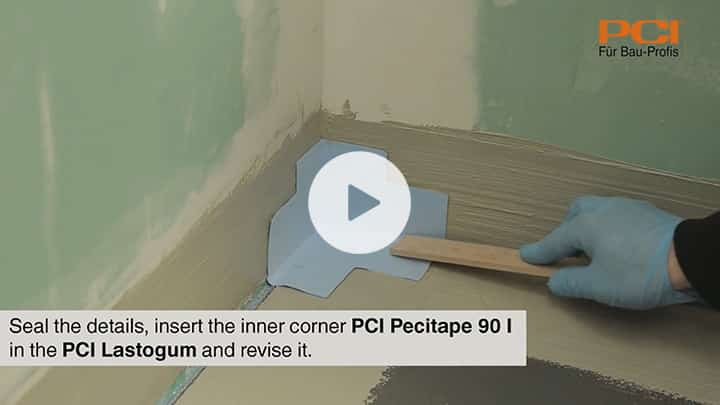
5. Waterproof membrane is a fabric, which is main protection against moisture. Should be laid on all connections and gaps between different parts of shower area.
Impermeable to water and resistant to frost, all-purpose use indoors and out. Resistant to ageing, insensitive to environmental influences. Reliable adhesion to the waterproofing products e.g. PCI Lastogum, PCI Seccoral 2K Rapid.
PCI Pecitape® 120 • PCI Pecitape® 90° I/A
Drying: 2 h • Second layer: 4 h • Tileable: 12h
- Apply PCI Lastogum or PCI Seccoral 2K Rapid by brush or trowel in the connection area floor/wall and/or wall/wall. Apply material in sections of approx. 10 cm and/or 15 cm.
- Press PCI Pecitape 120 into the wet waterproofing material. Do not use sharp-edged tools! On connections with PCI Pecitape 90° I/A, fix the edges of the waterproofing tape and corner piece with the waterproofing material or with silicone joint sealant. The minimum overlap should be approx. 5 cm.
- Make sure that PCI Pecitape is fully covered when applying the waterproofing material to the entire area.
PCI Pecitape® 42.5 x 42.5
Drying: 2 h • Second layer: 4 h • Tileable: 12h
- Cut a hole into the waterproofing collar PCI Pecitape 42.5 x 42.5 corresponding to the diameter of the component to be waterproofed (floor drain, pipe culvert etc).
- Apply the waterproofing material to the substrate by brush or trowel and press the waterproofing collar PCI Pecitape 42.5 x 42.5 into the wet material.
- Make sure that the waterproofing collar PCI Pecitape 42.5 x 42.5 is fully covered when applying the material to the entire area.
PCI Pecitape® 10 x 10
Drying: 2 h • Second layer: 4 h • Tileable: 12h
- Make sure - before applying PCI Pecitape 10 x 10 waterproofing collar - that the collar is fixed to the conduit pipe. If the conduit pipe does not reach beyond the waterproofing level a distance piece should be attached by a professional. The interim plug must not be covered!
- Apply the waterproofing material to the substrate by brush or trowel and put the waterproofing collar PCI Pecitape 10 x 10 over the pipe connection sticking out of the wall (if necessary remove interim plug beforehand) and fix with the waterproofing material.
- Make sure that the waterproofing collar is fully covered when applying the material to the entire area.
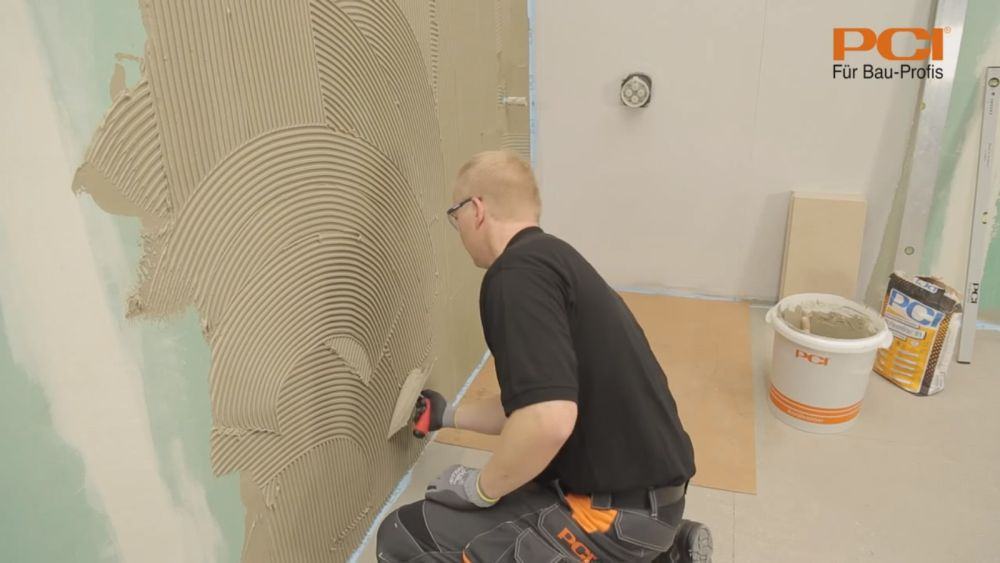
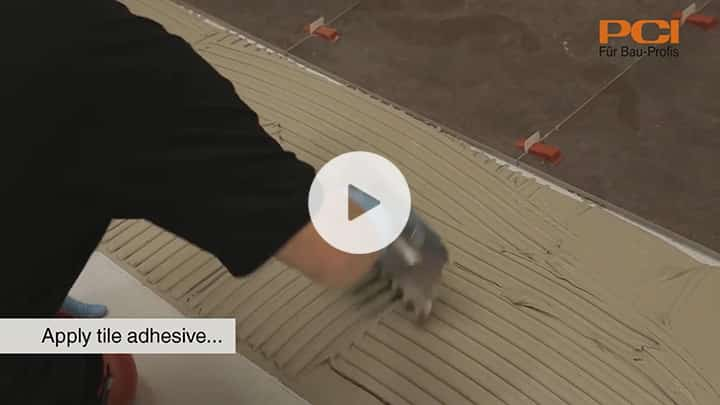
6. Tile adhesive is the substance used to long-term hold the tiles to the floors and walls.

For all substrates.
For all ceramic coverings laid in a thin bed or medium bed: non-vitrified tiles, vitrified tiles, fullyvitrified tiles, porcelain mosaic, glass mosaic, glass tiles, brick tiles and terracotta.
For laying tiles and flagstones on PCI Lastogum bonded waterproofing (e.g. private bathrooms) or PCI Seccoral (e.g. swimming pool and terraces).
For repairing and levelling irregular wall surfaces and floor surfaces (e.g. brickwork, render, screed) before laying tiles.
PCI Nanolight®
Walkable: 8 hours • Groutable: 8 hours • Able to bear weight: 24 hours
- Mixing of mortar:
a. Fill gauging water (see table) in a clean mixing bucket. Add powder while mixing to a creamy, lump-free consistency using a suitable paddle (e.g. from Collomix) attached to an electric drill.
b. Leave PCI Nanolight to stand for approx. 3 minutes, then remix briefly. - Levelling irregular substrates:
a. Mortar can be applied by trowel in the usual working method. Small spallings can be scraped off with a steel trowel, large areas with a browning rod in horizontal and vertical direction.
b. The levelling compound can be tiled on walls after approx. 5 hours, on floors after approx. 24 hours. - Laying tiles:
a. Apply a thin scratch coat to the substrate using the straight edge of the trowel.
b. Comb mortar onto the fresh scratch coat using the notched edge of the trowel. Apply only as much mortar as can be covered with tiles within the open time. Check the open time by touching the mortar with your fingertip.
c. Place tiles in the adhesive bed with a twist and slide motion and adjust them to correct position.
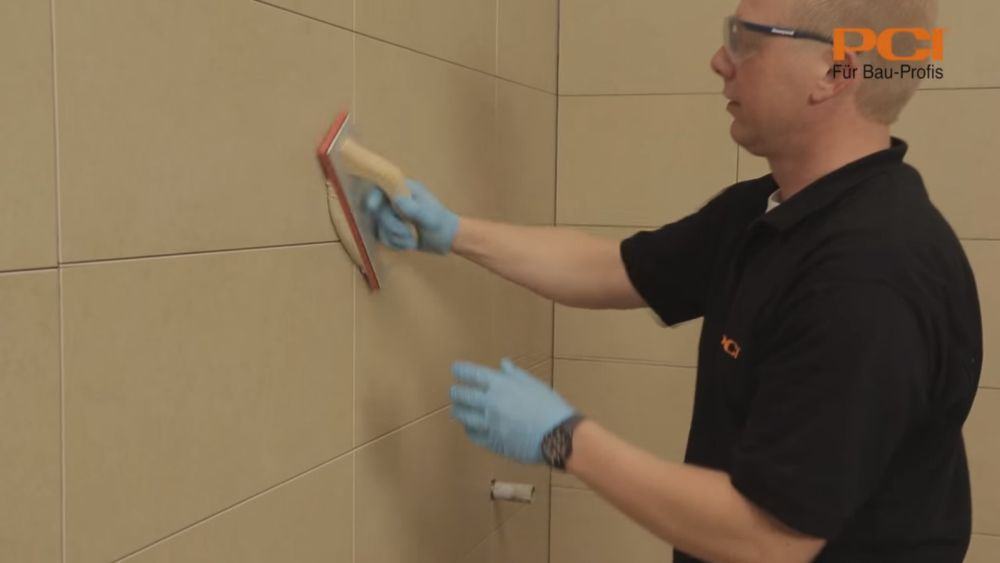
7. Joint grout is a particularly fluid form of concrete used to fill gaps. It is used to seal joints such as between tiles.
On heated screeds, dry screeds, precast concrete elements, plasterboards, gypsum blocks, particle boards, wooden floorboards and areas subject to extreme variations in temperature.
PCI Nanofug® Premium®
Drying: 40 minutes • Walkable: 2 hours • Able to bear weight: 24h
- Immediately after setting the tiles, rake joints clean to a uniform depth corresponding to the thickness of the tile. Allow adhesive to set.
- Fill gauging water (see mixing table) in a clean mixing bucket. Add PCI Nanofug Premium and mix to a creamy, lump-free consistency using a suitable paddle (e.g. from Collomix) attached to an electric drill.
- Leave to stand for approx. 3 minutes and re-mix.
- Work grout into the joints using a rubber grouting float and allow to set. Grout one more time if necessary to achieve a flush joint. After the grout has set (finger test) clean tiles with a slightly damp sponge or sponge float.
- When the grout is dry, remove the remaining film on the tiles with a damp sponge.
8. Joint sealant is silicone which is used to seal corner joints, movement joints and connection joints in sanitary areas, on balconies and terraces. They enable the relative movement of the structure’s components and prevent the ingress of water, wind or chemicals.
For sealing joints between glass, aluminium, wood, enamel, ceramic, rigid PVC and sanitary acrylic.
For sealing glazing rebates at window frames made of wood, anodized and non anodized aluminium.
For sealing butt joints at figured glass, corrugated glass, glass blocks and elements.
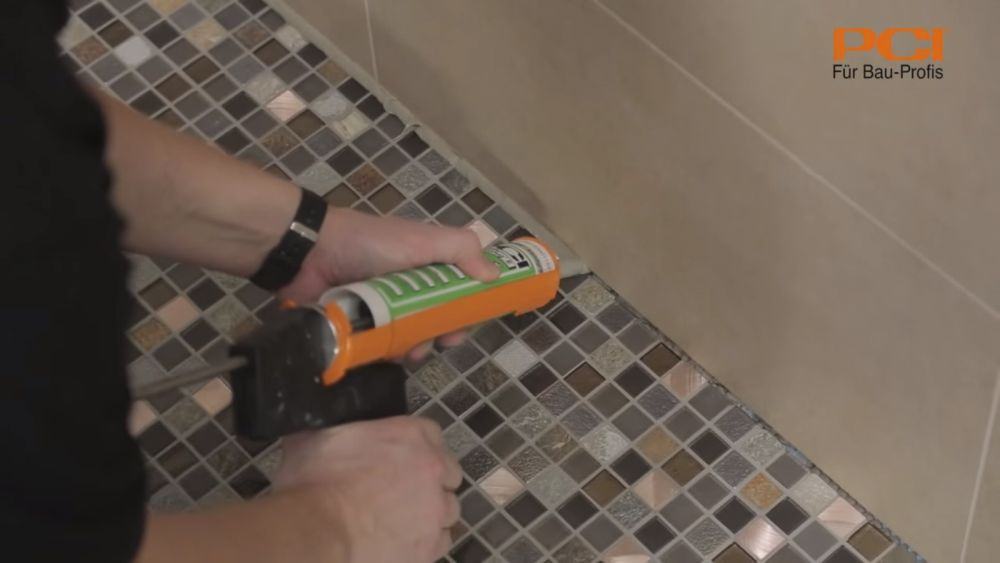
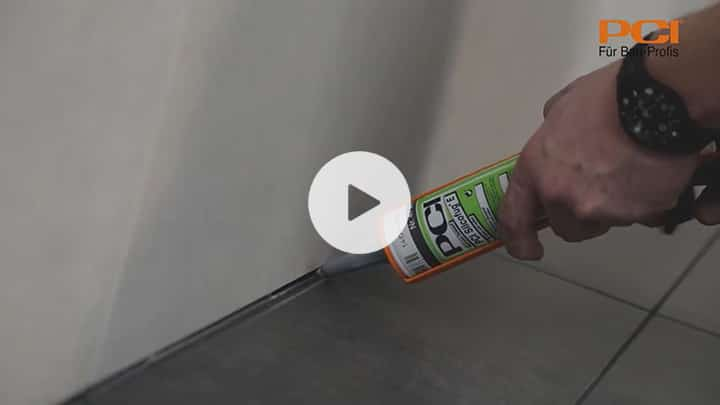
PCI Silcofug®
Time until skin forms: approx. 10 - 15 minutes • Curing: 2 mm/day
- Cut off tip of threaded nipple, screw on nozzle and cut off at an angle corresponding to the joint width. Fit cartridge into the caulking gun.
- Gun PCI Silcofug E into the joint using positive pressure to ensure full contact and adhesion. Tool to a bevel in corner joints.
- Smooth joint sealant before a skin forms using a suitable joint-shaping tool moistened with PCI Glättmittel smoothing agent. A skin forms within a few minutes. Work may be interrupted because new PCI Silcofug E perfectly bonds to a material which has already cured.
- Work grout into the joints using a rubber grouting float and allow to set. Grout one more time if necessary to achieve a flush joint. After the grout has set (finger test) clean tiles with a slightly damp sponge or sponge float.
- When the grout is dry, remove the remaining film on the tiles with a damp sponge.
