- Matt R.
- Shower drains
- 4711 views

One of the most horrible sights in any bathroom are mouldy silicone sealants. Not only it will destroy the look but also can be a real threat to your health. It often appears around bath tube, shower tray, sink or just between tiles.
If you discovered mould on your sealant just recently and there isn’t much of it, there is a pretty good chance that some good mould remover spray can cope with that. But if the joint is completely rotten, old and is not sealing properly anymore, you have to replace it to avoid further damage.
So how can you do this?
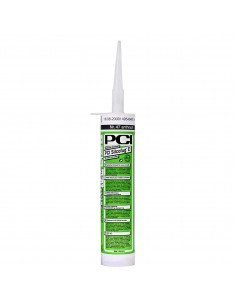
First of all you need to prepare tools and your work place. Depending on technique, time and budget you may need: sanitary silicone, silicone gun, stanley knife, paper towels, masking tape, silicone finishing tool, degreaser (e.g. acetone, white spirit), dish soap solution and sprayer bottle. For a work place preparation you need to scrub the area around the sealants you are about to remove and secure drain from any pieces of silicone getting into it.
Then, you can proceed with cutting out old sealant carefully. Remember to use fresh knife blade for cutting smoothly. It can save you from potential damage and scratches to your bath tube or shower tray paint. Mind that especially when dealing with acrylic appliances. If you are not able to remove silicone completely with a knife, help yourself with silicone remover. Use it according to manufacturer's instructions and wash the area thoroughly. After that it's time to degrease everything precisely (test the deagreaser first when using on acrylic).
After the deagreaser evaporates you can start sticking masking tape. This step is not necessary but it helps to create clean straight silicon line even on rough tiles. Use the tape especially when you are going to smoothen silicone only with your finger. Stick the tape about 3 or 4 millimetres from the corner gap on both sides.
It is a good practice to pour some water in your bath tube or weight down the shower tray before applying silicone. That will prevent sealant from cracking and deforming to much when you start using your appliances again. You can take the weight away when the sealant is fully cured. In case of wetroom shower tray you can simply skip this point.
Finally we can load our gun with a tube of silicone sealant. Cut of the end of the nozzle on around 45° angle so it can be applied smoothly. Don't cut to low or there will be to much silicone coming out each time you press the gun. Put the nozzle close to the gap and with one smooth motion apply silicone generously all the way down the gap. Be sure to fill the groove completely so the bond can be stronger. From now, you got little over 10 minutes to shape and smoothen the silicone before the drying process begins. Wet everything down gently with dish soap solution, choose size of the silicone finishing tool, and again with one smooth motion run it all the way through. If the joint is looking good you can remove the tape slowly. If not, apply some more silicone and repeat the process. After that, wet down the joint and your finger, and again very gently smoothen it for the last time.
And there you have it! Fresh, clean sealant that changes the game. Remember to clean all the silicone-stained surfaces as soon as possible. The drying time of the silicone should be indicated on the packaging. Full hardness is usually obtained after about 24 hours. It is very important to use a sanitary silicone that has special fungicidal agents.


