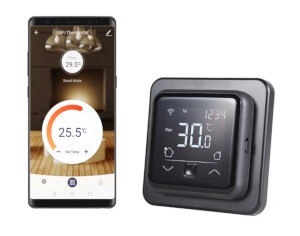
C16 Wi-Fi is undoubtedly the most frequently chosen thermostat model in our store that is on offer. Due to the large number of functions, certain problems not covered in the manual may appear during installation or use. By following the tips below, you will be able to set the appropriate options for your needs and learn some useful additional key combinations.
LOCKING / UNLOCKING THE SCREEN
A very useful function to protect the controller panel against unauthorized changes in temperature and settings. The key lock protects not only from the prying hands of children, but also from irresponsible household members or guests when renting a property.
The screen lock can be turned on and off both from the application and directly on the controller.
Controller:
- Press and hold simultaneously the central button (square) and the up arrow on the controller for 3 seconds.
- When the screen is locked, a padlock symbol will appear under the temperature at the bottom of the screen.
- Repeat these steps to unlock.
Application:
In the app, you will find the padlock symbol in the lower right corner of the main screen. A single short press is enough to turn it on and off.
WIFI RECONFIGURATION
Sometimes the controller may exit the pairing mode due to the too time limit or other connection problems. The pairing mode is indicated by the rapidly blinking WiFi symbol in the upper left corner of the thermostat screen. If the icon is not blinking or absent and the application on your phone does not work, you need to restart pairing mode and reconfigure your app:
- Press the controller up and the down arrow symbols simultaneously for 3 seconds until either F1 or F2 appears on the display (explained below).
- Confirm by pressing the middle button.
Option F1
Allows the thermostat to connect directly to your wireless network (2.4 GHz network required, additional restrictive security options in the router may cause connection problems).
Option F2
Access by pressing both arrows again simultaneously after the F1 option appears. Thanks to this option, the thermostat emits its own Wi-Fi network signal, and your phone can connect to it allowing the controller to then connect to the home network (this option should be used if the F1 option does not work for you).
RESET
If you want to restore the factory settings of the controller and start the configuration process from scratch, the "Reset" function available in the main menu will be useful:
- Keep the middle button (square) pressed to enter the menu.
- Using the up or down arrow select the SET item and confirm the input with the middle button (square).
- With the middle button (square) select function number 9 (visible in the upper right corner).
- Select "RST" with the arrow and confirm with the middle button.
After restarting the device, you will need to establish a new connection with the application or manually set the date and time if you are not using the application. If your thermostat stops working as previously configured after some time, use the "Reset" option and try to configure it from scratch. You can also delete and reinstall the application on your phone. Some application or operating system updates may require re-pairing and configuration of the controller and the application.
ERROR E1, E2, E4
The thermostat for electric underfloor heating can read the temperature from the built-in air sensor, floor sensor (included) or from an additional external sensor (not included). If you do not connect the floor sensor, and select option 00 (floor sensor) in the controller configuration, the controller will display an E2 error. If option 03 or 04 is selected, the controller will display an E4 error. Follow the steps below to set the correct reading option for the desired sensor.
- Keep the middle button (square) pressed to enter the menu.
- Using the up or down arrow select the SET item and confirm the input with the middle button (square).
- Use the up or down arrows to select the correct option while watching the numbers in the upper right corner of the screen:
- 00: Floor sensor (default, best option in most cases)
- 01: Room sensor
- 02: Room sensor with floor temperature limit
- Wait for automatic confirmation and go back to the main screen.
OPENING
The display of the thermostat can be difficult to remove the first time due to the strong latches. Follow the steps below.
- When taking off the display or putting it back on, never press down in the center or press the on / off switch on the side of the housing. It can damage the display and on/off switch.
See instructions in *.pdf.
Considering an Upgrade
Despite following the troubleshooting steps and tips provided, if you find that your C16 Wi-Fi Thermostat continues to experience issues, it might be time to consider upgrading to a newer model. Technology in the realm of smart home devices, including thermostats, is constantly advancing, offering improved efficiency, more features, and enhanced user experiences. Upgrading to a newer model could resolve persistent problems and provide additional benefits like better energy savings, more precise temperature control, and advanced integration with other smart home systems.
While it's important to weigh the costs and benefits, sometimes a new investment can be more cost-effective in the long run, especially if it means fewer maintenance issues and more efficient heating control. If you're contemplating this option, be sure to research the latest models and consider how their features align with your specific needs and home setup. Remember, upgrading your thermostat is not just about solving current issues; it's also an opportunity to enhance your overall home comfort and efficiency.
For a selection of recommended models that offer superior performance and advanced features, please see the options listed below.