- Alex D.
- Shower drains
- 1927 views

If you decided to choose a shower over a bathtub, in particular a walk-in shower, you must remember about the proper sealing of its entire surface. Unfortunately, tiles alone can not guarantee waterproofness, therefore, before placing them, we must use special sealing agents. It's important to use them in the right way. Below are a few tips that will help you to avoid problems with waterproofness, and thus with mold, bad tiles or flooding of your neighbour.
NO RUSH
After concrete screed is made you have to wait for it to dry completely (in accordance with the manufacturer's instructions). Contractors tend to proceed with further work when concrete is not fully cured. Unfortunately, it can cause later problems with adhesion and durability of the insulation layer. It is worth to provide the right temperature and ventilation in the renovated bathroom, and it will significantly speed up the drying process. Only on a properly made and completely dry floor we can carry out further work with no worries.
PRIMING
The main reason of priming is to increase the cohesion and adhesion of the substrate. However, actually it is also the first stage of insulation. The primer significantly reduces substrate absorptivity, which makes it easier to conduct further work. There are several important rules that must be followed to properly perform this sealing step. First of all, we must, as much as possible, clean primed surfaces of sand and dust. The more precisely we do it the better. The application method is also important. If we are working on a very smooth surface (fresh screed, gypsum board, wooden board), we can use a simple paint roller. However, in most cases, a brush or spray gun will be the best to reach nooks and corners. Priming must be done very accurately. Any surface that will later be covered with a liquid foil or tile adhesive must be prepared. It is not recommended to do just one layer of primer especially on a very absorbent, old or unstable surfaces. After priming is done, we have to wait with carrying out further work until substrate is completely dry. Depending on the conditions, this may take up to several hours.
LIQUID FOIL
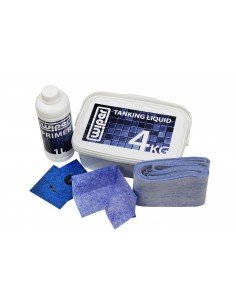
Creating that thin waterproof film using a liquid foil is the most important stage of the waterproofing process. As with the priming emulsion, it is very important to accurately carry out this insulation step. Foil coating must be consistent and solid. Particular attention should be paid to cavities and joins. As with the primer one layer will not be sufficient to obtain the coating thickness recommended by the manufacturer. Application on appropriately primed substrate is very easy and can be done using a simple brush. When priming and painting with liquid foil, we have to be sure to cover all the splash area and not only the shower itself. Just to be sure, the splash area should take around 50 cm from the shower tray in each direction. Walls should be covered almost to the ceiling. The next step is to cover the joints of the shower tray or drain, connections between the walls and the floor and water inlets. Due to the possible movability of these areas, the liquid foil is not enough. It is necessary to use special insulation mats. We glue them using the same liquid foil. Thanks to their flexibility, insulating membranes can bridge even very large cracks in the substrate, ensuring water tightness. For the sake of convenience, specially profiled internal and external corners as well as cuffs for pipes are available. After that we can proceed to cover the entire surface (including mats) with the second layer of foil.
More tips coming soon in the second part of this article!


